If I inspired you, I've done my job!
Showing posts with label IOM. Show all posts

March 02, 2012

Buck—perhaps, Wheat—not really


Gluten-free cereal. Sounds like an oxymoron… One might argue that there is no such thing. One who doesn’t know about buckwheat…

The fact that buckwheat is gluten-free is news to me. However, buckwheat and I go way back, to gestation trimester number 3: my mom recalls craving buckwheat and eating tons of it when she was pregnant with me. You can say I was «cooked» on it.

This strong tasting cereal is quite popular in Russia. Eat it in the morning with some cold milk or as a side dish, use it to stuff cabbage leaves (however, I would not recommend: no gluten=no sicking…) or make pilafs or salads. Here in USA the tiny pyramid shaped seed is not so popular and mostly known as «Kasha»—the roasted variety (Russian «kasha» means «porridge» or «cereal») or used milled into flour. I’m about to change that (I hope)!

What is this mysterious gluten-free cereal? The word «buckwheat» comes from the Anglo-Saxon words «boc» (beech) and «whoet» (wheat) because the seed resembles a small beechnut and is the same size as a wheat kernel. A clever name to trick an inscient gourmand.

Another interesting fact I learned latterly is that despite its grainy name the plant is actually a fruit and the grain is but a seed. So «gluten free cereal» is not an oxymoron after all! I still can’t wrap my brain around this discovery, but it doesn’t make me like my kasha less.

I always knew, although not from my own experience (yet), that buckwheat is very easy to grow. And that makes me wonder why isn’t it popular! Another property that should make this robust tasting ingredient famous in busy households is that it is very easy—and fast in preparation.

The benefits of buckwheat include but not limited to plant based protein and a substantial amount of fiber. That along should make buckwheat a star in every day vegetarian cooking! In addition, it contains all essential amino acids and B vitamins. Including buckwheat to your diet can help you manage high blood pressure and sugar levels if this is an area of improvement for you… To sum up—it is perfect all around (do I sound overly partial?)


But enough of the scientific talk. What you really need to know is where to find it. Buckwheat is sold in special Russian stores as well as in your supermarket most likely placed in an international or ethnic food isle. I find it with Jewish/Kosher foods.

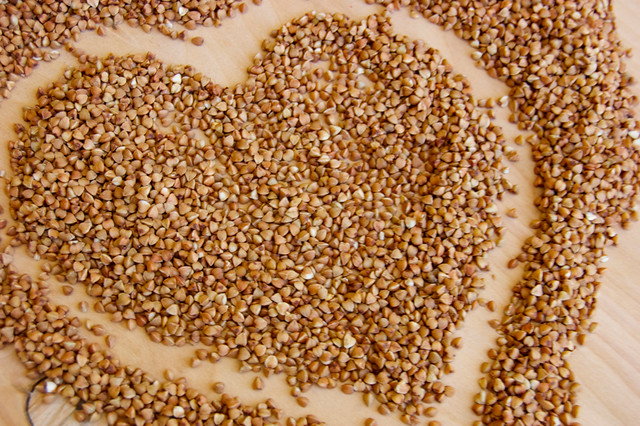
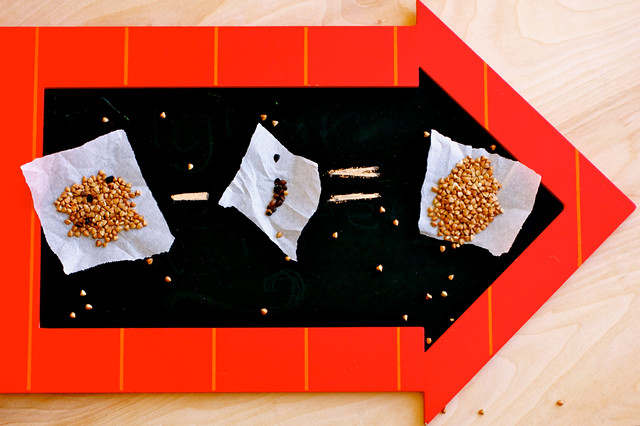
Before you cook buckwheat you might want to pick little black seeds out. There might not be much, but they do ruin presentation (and crackle on your teeth)
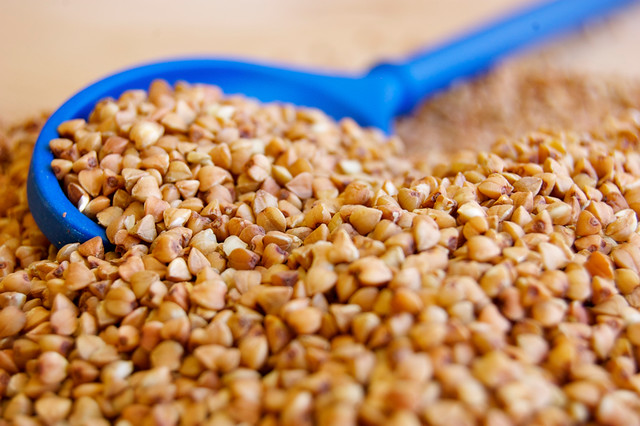
Now take one measure of dry buckwheat and two measures of water. If you want, you can toast it before, but most likely it is sold toasted. Now put the buckwheat and water in a sauce pan, bring to boil, add a pinch of salt and let simmer on a medium heat for 20 minutes or until all the water evaporates.

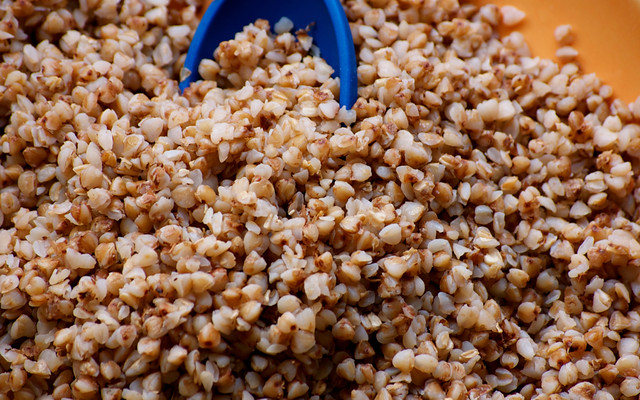
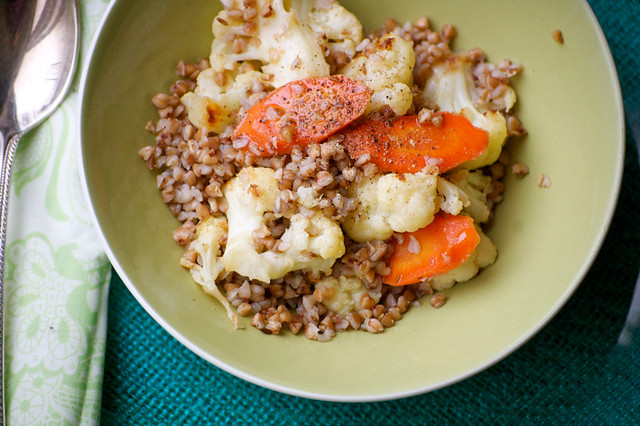
You can cool and store cooked buckwheat for couple of days in a fridge. I used it for this warm salad.

◊◊◊
Buckwheat and Roasted Cauliflower Warm Salad
Serves 4 to 6
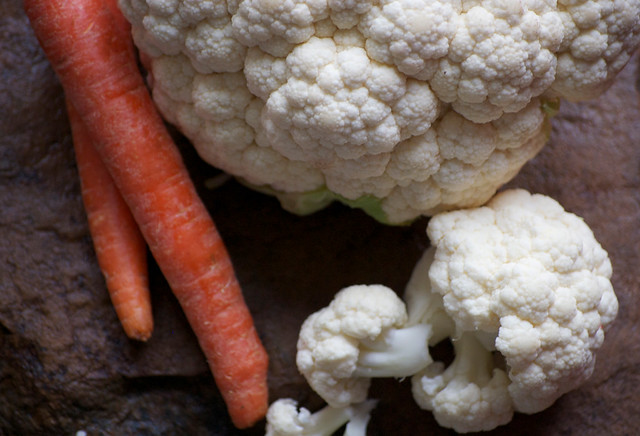
1 medium cauliflower, cut to florets
2 medium carrots, peeled and sliced on bias about 1/8˝ thick
1/2 t spoon cumin seeds
1/2 t spoon coarse sea salt +a dash
2 T spoons olive oil +1 T spoon
1 cup dried buckwheat
2 cups water
Freshly ground black pepper to taste

  • Preheat oven to 400° F
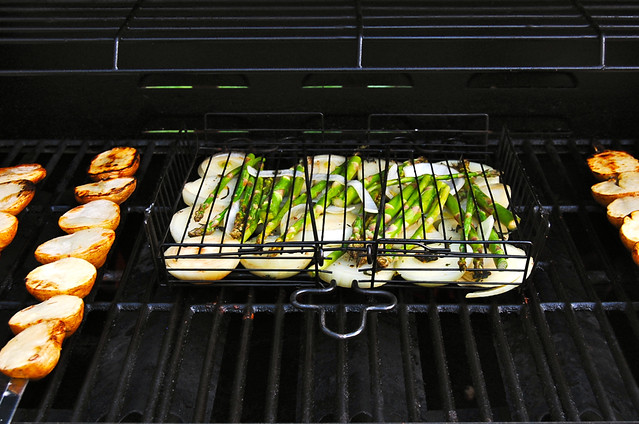
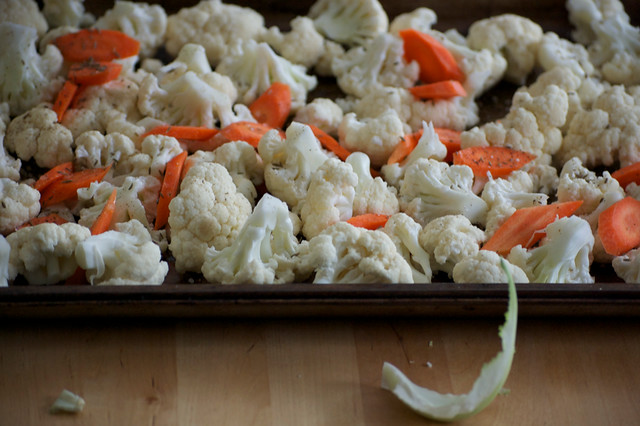
  • On a cookie sheet, arrange cauliflower florets and carrots, sprinkle with cumin seeds, salt and olive oil, toss and roast for 20–25 minutes
  • While cauliflower is in the oven, in a saucepan combine buckwheat and water, bring to boil, add salt, cover and cook on medium heat until all the water is evaporated for 20 minutes
  • When all is cooked, combine vegetables and buckwheat together, drizzle with olive oil and sprinkle with black pepper. Enjoy while it's warm!

Go on, give buckwheat a try, you will be gluten-free you did!

January 14, 2012

They call it Burgul or Bulghur or even Bulgar—I call awesomely wholesome!


There’s a trending topic on foodie twitter scene—to eat one new food each week. I like it! And from what I see, many adventurous and not so eaters and cooks decided to try a new vegetable each week. And it’s fine. But being a “grain girls” as my culinary student cousin called me, I want to introduce to my readers, and by instance to myself, a new grain each week…

I guess I already have one post on the subject this year. My last week can be counted in for lentils, although being legumes, are closely related to grains.

Why grains? Not only because I want to differ from anyone, but also because I like to encourage myself and, if I’m lucky, my entire family, to eat as much seasonal as possible. And this time of the year, although you still might find many vegetables in the supermarket, is the season of the grain!

Furthermore, adding whole grains to your diet is a good way to get health-boosting nutrition, vitamins and minerals without splitting your budget.
Also, I have already shared some recipes with whole grains in my previous posts about Barley and Millet and today I’m introducing Bulgur.

What is this strangely named grain? Despite its scary sounding name and rather long list of spelling variations—bulghur, burghul or bulgar—it is gentle parboiled wheat, cracked into three different varieties: fine, medium or coarse. Fine and medium can be used for stuffing grape leaves or vegetables, and my favorite—coarse bulgur—can be cooked into a wholesome pilaf. Bulgur is vastly used in Turkish and Middle Eastern cuisine—you most likely tried it in a salad, called Tabouleh and is considered a Whole Grain on this side of the pond.

It is also known as an ancient "instant" cereal. Because it's parboiled—that makes it partially cooked, the preparation time is half of its lookalike—cracked wheat. So, next time you want to switch up that rice-o-roni side dish routine, or swap your morning cereal, consider Bulgur for its awesome wholesome nutty taste, chewy texture and easy cooking.

I’m sharing a side dish made with frozen mixed bell peppers that is very easy and fast to prepare. The peppers add color and sweet flavor to this dish making it a perfect companion for almost any protein on your plate. I used dried oregano this time, but you can add any dried herbs of your choice. You can even garnish it with some fresh herbs. If you would like to use fresh peppers, please add an extra ½ cup of liquid to the recipe…

◊◊◊
Bulgur and Mixed Peppers Pilaf
Serves 4


1 T spoon olive oil


1/2 large onion, diced
2 garlic gloves, crushed
1 pk (14 oz) frozen bell peppers, do not thaw
1 t spoon salt
1 t spoon ground black pepper
1 t spoon dry oregano
1 cup bulgur
1 cup water/stock
  • In a saucepan, heat oil over medium heat. Add onions and then garlic and cook for couple of minutes until onions are tender
  • Add frozen bell peppers, season with salt, pepper and oregano and let simmer over medium heat until peppers are thawed, 2 to 3 minutes
  • Add bulgur, toss it with the vegetables, pour water/stock and bring to boil over high heat
  • Lower the heat to medium, cover the pan and let simmer until all liquid is absorbed. Turn off the heat but leave the pilaf on the stove, covered for another 3 to 5 minutes
  • Fluff with fork, serve and enjoy!

January 05, 2012

New Year's Resolution & Red Lentil Soup With Roasted Tomatoes

This is my first post in the New Year. This is my first post in a while!

As we welcomed the New Year we all made our resolutions. I have made one, too. My resolution is simple: to be resolute.

I will be resolute with thoughts in my head, but listen to the words of my heart more often; resolute about the destination, but enjoying the journey; resolute about what I must acquire, but continue doing best with what I have.

I will be resolute about every little detail in my life. All 1000+1 of them!

And I will be resolute with what I do best and learning along the way hoping that these little steps, repeated every day, will keep me in the right direction.

One of the things I do best (as I was told) is soup. That’s why I’m sharing this delicious soup recipe with you today. It is easy to make and perfect for a crispy-cold winter day. The only challenge here is to peal the tomatoes. You must not skip this step for tomato skin is tough and indigestible when cooked. It’s a labor of love! But if you rather skip the labor, you can use 8 oz can of diced or crushed tomatoes. Just add it the last 10-15 minutes of cooking.

◊◊◊
Red Lentil Soup with Roasted Cherry Tomatoes
Serves 8

2 medium carrots, chopped
2 medium celery stalks, chopped
1 medium (1/2 large) yellow onion, diced
2 cups red lentils, washed and drained
1 T spoon tomato paste
1 pint grape tomatoes
Few sprigs of thyme, divided
8 cups water/chicken broth
3 T spoons olive oil, divided
Salt+Pepper to taste


  • Preheat the oven to 350°F; arrange washed grape tomatoes and couple of sprigs of thyme on a covered with foil cookie sheet, drizzle with olive oil and season with salt and pepper; roast for 20 minutes;
  • While tomatoes are roasting, in a large pot heat the olive oil over medium heat; add onions, carrots and celery and cook until tender. Add in tomato paste, and remaining thyme leaves (discard stems) and cook for another minute;
  • Stir in washed lentils and add water/broth, cover and bring to a boil. Reduce heat adding salt and pepper to taste and let the soup simmer for about 40 minutes or until lentils are cooked;

  • When the tomatoes are done, wrap them in the foil that was covering the cookie sheet, let cool for 5 minutes. Peal the skin from tomatoes and add them to the soup with the oil and thyme that is in the foil. Let all stand together for 5 minutes;
  • Serve with warm bread to 6-8 people.


October 13, 2011

Easy As Apple…

…pie? No, apple pie is not THAT easy to make. This phrase should be: Easy as apple sauce! Because this tasty concoction, that usually bought from store, is very easy to make at home. All you need is some freshly picked apples, a little water and sugar+spice, if you want. And a pair or two of helping hands. That makes it perfect to cook with kids. Depending on the age, they can help you peel, core and slice the apples.

You will also need a roomy sauce pan, depending on how much sauce you are going to make. If you make extra, it can easily be stored in an air tight container in a refrigerator for weeks.

This recipe makes about 2 quarts of apple sauce.

◊◊◊
Easy Apple Sauce

6 medium to large golden delicious (or any variety) apples
2 T spoons brown sugar*
1 stick of cinnamon (or 2 t spoons of ground)
Some water
  • Wash, peel, core and slice apples (that's when you will need that extra set of hands)
  • Add water to the sauce pan to cover the bottom for about 1/2 inch, put it over the medium heat; throw in sugar and cinnamon
  • Start adding chopped apples, cook, stirring occasionally, until they all soft and mushed; takes about 20-30 minutes
  • You may mush them more, if you like it smooth; I leave it as it is for I like chunks…
*you might want to add more sugar if using sour apples.

That's all falks! Now pack some of this fresh yumminess into your lunch bag and enjoy!

October 04, 2011

Apples for Breakfast

How about apples for breakfast? I agree, that they are fine they way they are, but pancakes are fun!

◊◊◊
Whole Wheat Apple Pancakes
Makes 12 3˝–4˝ pancakes

{WET}
1 large apple, peeled, seeded and finely chopped
1 cup milk, preferably at room temperature
1 egg, beaten
1 t spoon vanilla extract
1 T spoon sugar
2 T spoons vegetable oil

{DRY}
1 cup whole wheat flour
1 t spoon baking soda
1 1/2 t spoon baking powder
1 t spoon ground cinnamon
pinch of salt
  • Combine all the wet ingredients in one bowl, whisk together;
  • Combine all the dry ingredients in another bowl, mix;
  • Mix together wet and dry, whisk a little bit (don't over-mix) and let the batter rest while you prepare the griddle (if using an electric griddle, heat to 350°F);
  • Ladle 1/4 cup of batter on a hot griddle, fry for 3 minutes and when the bubble appear, flip to fry for another 3 minutes;
Serve topped with some home-made butter and drizzled with honey.

October 02, 2011

Golden Delicious. Golden & Delicious!


This last Saturday we finally got a chance to go apple picking. Every year we pilgrimage to an apple orchard near by, sometimes several times during the apple picking season. Alas, not this year. Due to the constant rain and literally outflowing problems we were only able to take a trip to the Northhampton county for the first time this past Saturday, October 1! Despite the more than 50/50 certainty of rain, it was a nice overcast day bracketed between this never ending rain. So we took advantage to set off on a delicious adventure, Golden Delicious!

We climbed and jumped down, ran around and sampled fresh air and apples and brought home tons of crispy Gold Delicious, which are abundant this time, and some bumpy Red Delicious as well.

So it is obvious that I will be writing about apples this month, or rather about apple recipes…

And let me start with a dessert: thinly sliced baked apples resting on a vanilla cloud…

It is called Charlotte. No, I didn't give it its name. I have no idea why it's called this way, and I don't feel like doing any research, since I already know all I need: it is a quick and easy delicious dessert recipe!

By adding some cinnamon I adjusted a popular version a bit. The preparation is very quick and takes way less time than to type the recipe here…

◊◊◊
~Charlotte~ An Apple Dessert

2 medium golden delicious (or any sweet variety) apples
some lemon juice
1 t spoon cinnamon
4 large eggs
1 t spoon vanilla extract
1/2 cup white granulated sugar
1/2 cup all purpose flour

1 T spoon butter for preparing the spring pan
+some more flour for dusting

1 T spoon confectioner's sugar, if desired
  • Peel, core and thinly (≈1/4˝) slice them. Drizzle the lemon juice over the apples to prevent from browning and then sprinkle with cinnamon.
  • Preheat the oven to 400°F. Butter the spring form (or any other dark* cake pan) and dust with some flour. You might avoid it altogether if you're using non-stick baking spray, I don't use it and don't recommend, but if you're accustomed to it, go ahead…
  • In a bowl, beat the eggs+vanilla until they foam, for about 3 minutes on high speed. Gradually add the sugar, continuing beating but now on a medium speed. After all the sugar is added, beat for another 2 minuted on a high speed.
  • Turn the mixer off, sift the flour into the egg mixture. Slowly beat it together until all combined.
  • Pour the batter into prepared pan, top with apples and bake for 30-35 minutes or until inserted into the center toothpick comes out clean. Cool.
  • Dust with some confectioner's sugar if desired…
Enjoy this deliciously golden and easy dessert!

*The time is for a dark metal pan.

September 23, 2011

Lingering the Roasted Summer Taste

Before we kiss the summer harvest good-bye, I want to share this new recipe. It is a perfect treat for a rainy early autumn days yet a tasteful reminder of summer. The pungent taste of the bell peppers, which are still available at the farm marked, is the perfect summer taste that I want to hold on to. Let it linger, just a little more…

I came across a picture of this recipe somewhere online and since I had an overload of heirloom bell peppers, I couldn't resist not to try it. I would say I heavily adapted it for I didn't even bother reading the recipe, I was too inspired and exited to make this soup.
To counterpart the taste of bell peppers, I used fresh celery, which is also still abundant at the market. I used stems and leaves, which given my soup its fresh note.

◊◊◊
Roasted Pepper+Celery Soup
Serves 8-10
6 medium bell peppers
2-3 celery stalks+leaves, chopped
1 medium onion, diced
2 T spoons olive oil
6 cups water/stalk
Salt+Pepper to taste

• Preheat the oven 450° F. Wash peppers
• Line peppers on a shallow cooking sheet, roast in the preheated oven for 20 minutes
• Place the peppers in brown paper bags and let cool. When cool, peel the peppers collecting the juices and discarding the seeds and stems
• In a pot, heat the oil and sauté onions and celery for 5 minutes over medium heat
• Add peppers with the juice. Sauté for another 5 minutes
• Add water, bring to boil over high heat. When boiled, add salt+pepper
• Remove from heat and blend with an emersion blender or in stand-up blender in batches
• Serve with some fresh celery, peppers and your favorite bread
Summer is gone, but we can still savor its flavor even if for a little while…

August 04, 2011

The Cook's Soul

I love proverbs and saying from different cultures and in different languages. In Russia, we have yet another saying "Вкладывать душу" that literally translates to "put {one’s} soul in {something one does}”.

An imaginative little child that I was, when I first heard this phrase I tried to imagine how a person would put a piece of his soul in his project. It would look like a little cloud, emanating from the chest area, gently descending on a man's work, growing and smoothly enveloping the new creation, illuminating it from within.

As I matured, this saying became my guide. No matter what I do, I believe that a little particle of my soul always passes on to my work. On a bad day, when I complain about my daily rut, I remember that hologram I once had in my imagination when I was a child and instantly my perspective turns around. Because when you put your soul into something, you illuminate your creation as well as the process itself. I believe that you give or rather share life with your endeavors.

I also believe that soul is a flow of energy and everything has its own energy. When we touch the surface, we pass our own liveliness, creating a ripple effect. If we touch with kindness the ripples are smooth and soothing. We have an effect on everything we touch.

Now think about how we affect the food. When we cook, we pass our energy to the dish. That’s why it is even more important to pour your soul into your cooking. The food with soul is alive and potent whereas the commercially prepared food is weak and dead for most of the part. No wonder when we eat commercially prepared food, a.k.a. processed foods we often feel tired and sluggish.

When we cook, we get to share our soul, our heart and love with our dear ones. Machine has none of the above-mentioned qualities, at least since the last time I checked!

My dad’s cooking is a perfect example. He doesn’t cook often but when he does, he gives in wholeheartedly. Ever since I was little I enjoyed watching him cook: with love and kindness, he would carefully prepare the ingredients on a chopping board, making sure that each piece is equal to another. Then he would attentively combine everything over the element, creating a delicious dinner. It looked like he was in meditative state of mind. We always liked his cooking better than my moms, however, when confronted we were hesitant to admit it! He still cooks, alas even less often then before, but approaching his task with the same significance as ever.

One of my favorite dishes my dad cooks is a ragout of nightshades. We didn’t have a name for it until one day my husband told me that in Arabic cuisine they have a similar dish and its name is … The Cook’s Soul. Isn’t it poetic?

This time of the year, the nightshades are making appearance in the local gardens and farm markets. The nightshades are tomatoes, eggplants, peppers and potatoes. The latter one’s fruits aren’t eatable, of course—but it’s a story for another blog post …

◊◊◊
The Cook's Soul
Serves 6
½ pound eggplants (2 medium)
½ pound tomatoes (3-4 medium)
½ pound bell peppers (2 large)
1 jalapeño pepper
2 medium carrots
1 medium onion
3 cloves of garlic
2 T spoon tomato paste
2 T spoon olive oil
Salt and freshly ground black pepper to taste

1. Prepare the eggplants: peel the skin if desired and dice the eggplants. I peel it with a julienne peeler (I think it’s the name of this gadget) so it is easier to cut through the skin. Put the diced eggplants in the colander and pour 1 teaspoon of coarse salt over to let the bitter juice run off.

2. Prepare the tomatoes: score a cross on the top of each tomato (the opposite pole from where the tomato is connected to the vine) and pour an entire teapot of boiling water over the tomatoes. Let cool and peel the skin starting at the incision. Put whole peeled tomatoes aside.

3. Prepare the peppers: cut the top off, remove seeds and membrane and then cut the pepper in 8 and then slice across. Slice it with the inner side up so knife goes through the pepper’s flesh effortlessly. Otherwise, the skin will be in a way. Repeat the same with jalapeño pepper, with caution, if using.

4. Chop onion and carrots and crush the garlic.

5. In a large skillet heat oil and add onion, carrot, garlic and peppers. Reduce heat to medium, cover and let it all sweat for 10 minutes. Remove the cover; add salt and freshly ground black pepper.

6. Add diced eggplants. Mix it all together, cover and let it sweat for another 10 minutes.

7. Meanwhile dice tomatoes, preserving the juice. Use a serrated knife but if you don't have one, you can use a stake knife to easily cut through tomatoes. When eggplant is almost all translucent, add diced tomatoes and tomato paste. Mix it, cover and let cook for another 10 minutes until all comes together and eggplants are completely cooked—they will not have any white left inside.

8. Serve with bread, rice, or another nightshade representative—boiled potatoes.

Here’s a piece of my soul in the Cook’s Soul!

July 01, 2011

Grilled Summer Vegetable Salad

It's July, finally! And it comes with all sorts of fun around here: my garden started to yield first vegetables from the patch, raspberries and blueberries a plenty, crafts in open air, sun, summer rain, and star speckled skies during a backyard campout. A lot to occupy yourself, so why bother with cooking? Especially when there are a lot of fresh produce on the market. Farmers and gardeners with a gentle help of mother nature have invested a lot of labour into each vegetable you by this month from the market. Why work any further?

Yes, I am proposing a vegetable-eating month. And, when possible, raw eating. It might sound hard, but with few knife techniques and a bit of grill heat (plus a great deal of will power), we can indulge in fresh and vitamin packed dishes.

I'll start with grilled vegetable salad. This one is my all time favorite. You can use any seasonal vegetables you have available. Mix and match- mix the vegetables and match the grilling time. Dress the final dish with a drizzle of olive oil and some salt and pepper to taste and viola!

◊◊◊
Grilled Vegetable Salad
Serves 4 if main dish, 6 if as a side dish
2 medium zucchini, cut in half longwise
1 red bell pepper, seeded and sectioned
1 yellow bell pepper, seeded and sectioned
1 large onion, cut in half longwise
2 T spoons vegetable oil
1 dried red chili pepper, crushed
Salt+Pepper to taste
Preheat grill to medium heat
Grill the vegetables, 5 minutes each side
Let cool slightly, enough for you to be able to cut them
Cut grilled vegetables into chunks, arrange in a serving bowl
Drizzle with oil and season

Of course if vegetables alone is not enough for you, you can toss in some pasta, rice or even grilled meat or chicken, cut into strips. I will try to eat meatless this month. We'll see how it goes…

June 02, 2011

I've Gotta Grilling!

Last year as we were remodeling our kitchen I was left without a stove, an oven and even without a sink. It would not be a big deal if we were fond of takeouts, but we're not. I had to improvise on a grill to create dinners. And for the sink, I had to use a garden hose suspended over the plastic container. Honestly, I loved my impromptu outdoor kitchen. It felt so primal!

I want to repeat it this year. Not the sink part, but as the temperatures rise, I have a feeling for grilling. The whole month! Last year, I have tried few dinner dished that are normally prepared on a stove top or in an oven. This time not only I will try to re-create them, add new ones, but also blog about my experiences! So stay tuned this month for dinner makeovers on a grill!
First one is my family's go to meal, herb roasted chicken. I roast chicken in the oven with onions and potatoes—the vegetable choice of my kids—and sometimes add green vegetables such as asparagus. Now, I'm grilling this roast!

As we all know, grilling starts not with firing up a grill but with proper preparation. And by preparation I mean the process of marinading. So, I took a whole chicken, quarter it and marinaded it with fresh herbs {sage, rosemary, oregano and thyme}, garlic and onion rings. Now, I could of used the whole chicken and roasted it on a rotisserie attachment, but a) I didn't have this attachment; b) the chicken, coming from local farm, was 5 1/5 lb. I had 8 hungry people to feed!

I am not going to post a formal recipe, just a description of what I did. I couldn't even find a proper name, but it's totally irrelevant! :)
◊◊◊
Grilled Chicken With Grilled Potatoes, Onions and Asparagus
Chicken:
One medium to large {5 1/5 lb} whole chicken on a bone, skinned and cut into 4

For marinade:
Extra virgin olive oil—1/3 to 1/2 cup
Fresh herbs of your choice—1 bunch
Garlic—5-6 cloves
Black pepper corns—about a teaspoonful
Coarse sea salt—1 to 1 1/2 teaspoons

1 lb yellow onions, peeled, cut in 4 pieces across
≈≈≈
Potatoes:
2 lb yukon gold medium size potatoes, washed and cut across in halves
2 T spoon of olive oil for grilling
≈≈≈
You will need:
A wire basket
Metal skewers, enough to fit all the potatoes
Metal (grilling) tongs
≈≈≈
  • Mash herbs, pepper and salt with a mortar and pistil until all crushed. Add e/v olive oil and cover the chicken and onions. Let marinade for at least one hour.
  • You might also want to add one bunch of asparagus, although it's optional and need not to be marinated.
  • Preheat grill to 350°F (Grill)
  • Arrange chicken, cover and cook for 20 minutes, keeping the temperature at 350°F.
  • Arrange potatoes on the skewers and onions and asparagus in the wire basket.
  • Flip the bird, add potatoes on the skewers to the grill, cover and cook for another 30 minutes keeping the temperature same, at 350°F.
  • Check if chicken is done: it should run clear when poked, or if you have an instant read thermometer, it should read 165°F when inserted into the thickest part of the chicken. If bird is not ready, cover and cook for another 10 minutes. If it is, take it off the grill and arrange in a baking/serving dish and let it rest and re-collect all the juices under a sheet of aluminum foil.
  • Put the wire basket with onions and asparagus on the grill where the bird once was and flip the potatoes. Cover and cook for another 10-15 minutes until potatoes are fully cooked. Don't overcook potatoes, they will fall apart and may even fall into the grill.
  • Once potatoes are cooked, remove the chicken from the serving dish (temporary) and arrange the vegetables on the bottom. If desired, season the vegetables with a dash of sea salt and toss.
  • Put the bird back, now on the bed of grilled potatoes, onions and asparagus. Cover with foil and let it all rest for 5 minutes until serving.
  • Cut the chicken and serve with the side of grilled vegetables and some fresh green leaf salad.
≈≈≈
I have to admit, if I was reading all this, I would probably think this is an elaborate idea. I have to assure you, however, it is very easy to prep and to grill this dish. In time it takes you to finish reading this post, your dinner could be on the table! Unless, you're a speed reader :)
Enjoy cooking and eating al-fresco!