If I inspired you, I've done my job!
Showing posts with label circassian. Show all posts

May 27, 2011

An Act of Cilantropy

Before everyone gets busy with the Memorial Day festivities, I wanted to share this delicious alternative to catsup. One might find it more coarse in texture, but the splash of fresh flavor is undeniable, due to this wonderful herb called cilantro.

It is quite popular in Asian and Mexican cuisines. And I won't bore you with detailed information on the benefits of a plant with delicate fan shaped leaves. I will tell you one thing: do your taste buds—and eventually your health—a favor and try using cilantro. Practice some cilantropy towards yourself…

Cilantro leaves are so delicate and wilt fast, to keep them clean and crisp keep them in a bowl of ice cold water before cooking with it.

Plant some in your garden, or find organic cilantro in your market and try this simple recipe for a fresh home made condiment. It is generously versatile: use as a dip, or spread on burgers, kabobs, or add to pasta, hot or cold alike. The ingredient list of this spread was inspired by flavor combinations of Caucasian cuisine.

◊◊◊
Cilantro Dried Tomatoes Spread
Makes about 8 oz of pesto
1 bunch cilantro (washed and dried)

4 oz dried tomatoes
1/4 cup shelled walnuts
2 cloves of garlic
1-2 dried chili pepper, few black pepperocrns
Freshly squeezed juice of 1/2 a lime
1/2 cup extra virgin olive oil
  • Place all the ingredients in a food processor and pulverize into a uniform mass.
  • Serve it with whole wheat pita bread, on a burger, or as a dip.

May 18, 2011

{A Glimpse of My Motherland…} Wordless/Nostalgic/Wednesday

[Долина Нарзанов//Narsan (mineral water) Valley]

[Ледник "Семёрка"//Ice Range "Seven" on a background]

March 30, 2011

Haliva—Circassian Pierogies

Strolling through the frozen isle in my supermarket, looking for ideas for my last Meltdown for March, hoping that the weather will melt down soon, too I came across pierogies. Right next to Polish pockets full of yummy I saw Chinese dim sum and egg rolls, Italian ravioli and even Turkish borek. Then I spotted Mexican empanadas, looking so sad with a frown next to frozen empanada dough disks. It dawned on me that there is variant unleavened dough wrapped around stuffing creations, fried or boiled, in almost any cuisine. I remembered our own—haliva. Whether fried or boiled—psi haliva, or with different stuffing—cheese, potatoes, meat—they are always a special treat!
I have heard that nowadays many cooks use frozen dough to make these hot pockets (oh, boy! now the jingle from the commercial ad for “Hot Pockets” is stuck in my head) and I agree that it is quite convenient. So why not make your own and freeze them?

Unleavened dough is very easy to make. All you need is water, egg, pinch of salt and flour. To be exact:
1 cup of warm water (102° F)
1 teaspoon salt
1 large egg
3 ½ + cups all purpose flour (you can use white or whole wheat)
  1. Put salt in the water, add egg and mix it all until well combined;
  2. On a clean dry surface pile up the flour, make a well and slowly pour water+egg mixture with one hand, starting the dough with the other;
  3. Knead the dough until semi-soft and smooth, cover and let rest for about half an hour for gluten to set.
Roll the dough in batches to 1/8˝ thick and cut out circles 5 ½˝ in diameter—I used a top of a small sauce pan.
This recipe yields about 50 disks 5 ½˝ in diameter. You can make these shapes smaller or bigger, depending on how you are going to use them. We like bigger size for fried halivas. Layer parchment paper in-between the disks or flour them generously and freeze them up to one month in a zip lock bag, 10 per each package. When needed, thaw the disks at room temperature for about one hour in the bag.

Unleavened dough is very versatile. You can stuff it and fry, boil or bake. You can make ravioli, tortellini, pierories, pelmenis, empanadas, dim sum, egg rolls, manti, borek, haliva and you can even layer it to make a lasagne dish! Not to mention it makes yummy unleavened bread.

Since this time of the year for unleavened breads and vegetarian diet, I decided to make cheese haliva this time. I made my own milk cheese.

I might sound intimidating to make home made cheese, but I can assure you it is not scary at all! All you need is a gallon of milk, a cup of white distilled vinegar, and some seasoning, if you desire.

This is what you do: bring a gallon of milk to a boil in a large stockpot. Stir constantly to prevent scorching. When milk starts to foam, turn off heat and add vinegar. Let it curd for 8 to 10 minutes, add seasoning—I used 1 teaspoon of ground savory and 1 teaspoon of salt. Line a colander with cheesecloth and pour the cheese through. You can collect the whey to use it in other dough recipes or to drink—it is quite thirst quenching—by putting a large bowl under the colander. Let the whey cool and then transfer it to a jar with lid and refrigerate. What is left in colander is your homemade cheese for haliva. Set it aside as you prepare your dough.

To assemble halivas, put one tablespoon of cheese on the disk, brush the edges with water using your finger or pastry brush, turn it and pinch sides with fork. I make large pinches because I like the crunchy edge. You can also use the dough wheel but I do not have one so fork works for me.

In a large skillet, heat ½ cup of vegetable oil—any light frying oil that does not burn, I used corn oil—and fry 3-4 haliva at a time. 2 minutes on each side. Do not let it brown; the color should be gold or orange.
Transfer the pockets onto a platter lined with paper towel to soak up the excess oil. Serve with hot tea, yogurt drink, or that whey that you have collected while making cheese.

Enjoy!

{Note} If you don't like cheese you can substitute it with mashed potatoes. I know I will have to make potato version, too, just for Maya—my meat and potatoes girl!

March 21, 2011

Spring has sprung

On March 20th it was first a day of Spring. And even though Winter does not want to go, holding on to the last wilted leaf that was left by her dear friend Autumn, soon young Spring, accompanied by cheerful chirping of returning birds and bickering streams, followed by the parade of frolicking of emerging from slumber insects and under the awning of velvety sun rays will rightfully ascend the throne.

Despite Winter's desperate attempt to linger by covering the ground with bleak snow, plump buds on the trees are ready to burst with life and it tells me that gardening season is near. Soon, I will sink my hands into soft fertile soil preparing it to accept seeds to nurture and grow.

In many cultures around the world for many years spring represented rebirth, a new beginning. Especially for those, whose wheel of life was tuning on the endless farming fields. And of course this change of season was always met with special celebrations.

My people, Circassians, was no exclusion. Living on fertile land every spring they would begin sowing in early spring. But before they would celebrate a new year, the first day of spring, МафIэщхьэтыхь (Mafeshhetih) or Гъэрэ щIырэ щызэхэкI—Spring Equinox. These festivities included cultural rituals involving games (Adyga Jegw), dancing as well as religious customs: Circassians made an offering to their gods by slaughtering a black animal, most offten young black chickens in hope that this sacrifice will rid of bad spirits and bring a pleasant and plentiful farming season. The chicken would then be prepared in a traditional dish Djedlibje that translates to "Fried Chicken"—a creamy chicken dish.

Back in North Caucasus my mom and grandma would cook it with sour cream. When I first tried to recreate it here with sour cream, it wouldn't taste the same. Then I discovered that heavy cream in lieu of sour works much better.

We used a special spice, Djedgin—chicken powder—that was a ground powder of dry wild thyme or savory. I was able to find it here, too.

And the authentic recipe calls for whole chicken, cut into portions. I use boneless skinless breast and thighs because it's easier to eat and faster to cook.

One tradition remains unchanged: I serve this dish with pasta—an authentic Circassian spoon bread made of millet. I've posted the recipe before here.

◊◊◊
Circassian Creamy Chicken
3 lb skinless boneless chicken
(this time I used 1 1/2 lb of breast and 1 1/2 lb of boneless thighs)
1 cup finely chopped onions
3-4 garlic cloves, crushed
1 1/2 teaspoon ground savory (or thyme) divided
1 teaspoon cayenne pepper
Salt and black pepper to taste
2 TB spoons olive oil
16 oz heavy cream
1 cup cold water
1 1/2 TB spoons all purpose flour
  1. Cut chicken into 1˝x2˝ pieces, add half of ground savory, cayenne pepper, salt and pepper, mix with chicken and set aside.
  2. In a dutch oven or heavy pot heat 2 TB spoons of oil. Add chicken to it and brown it on a high heat for 5 minutes stirring frequently to prevent burning. When chicken is white and starts to turn golden brown, add onions and garlic, lower the heat to medium, cover and simmer for 20–30 minutes, stirring occasionally.
  3. Add 1 1/2 TB spoons of flour to cold water and whisk it until all flour is dissolved. Pour this water into the pot, rase heat and bring it to boil.
  4. Add cream, let it boil over the hight heat, then immediately lower the heat to low add the rest of the spices and let simmer for 10 minutes to let the sauce thicken a bit.
  5. Turn off heat, let stand for couple of minutes and serve with pasta.
Фытхъэжь!
Enjoy!

February 23, 2011

Georgian Chili: Chakhokhbili [Чахохбили]

What makes chili a chili? For me it's a chili pepper, of course! Or any other hot pepper. I have prepared a chili recipe to share with you, a more traditional version, but then I thought I'd share this idea first. There's a Georgian dish named Chakhokhbili (and it does rhyme with Chili!) that is prepared using chicken, tomatoes, peppers and fresh herbs. Originally, they use the whole chicken with bones. I used boneless skinless drumsticks--the dark chicken meat makes this dish very hearty. However, you can use any part of chicken. The trick is to sauté the chicken before adding everything else.
Although some variations of Chakhokhbili call for a bell or sweet pepper, I decided to use the bitter one- red hot chili (dried). To re-hydrate the peppers, I poured hot boiling water over and soaked the peppers for couple of hours. If you want to make the dish less spicy, remove the seeds. If you want it mild--just use bell pepper.

My version is quite spicy, so beware!

◊◊◊
Chakhokhbili- Spicy Chicken & Tomato Stew from Georgia


2 lb dark chicken meat, boneless and skinless
2 cups (about a pound) slices onions
2-3 closes of garlic, crushed
1 cup (about 4 oz in weight, please see photo above) re-hydrated red hot chili, chopped
2 cups chopped fresh herbs: cilantro, parsley & dill
1 (16 oz) can diced tomatoes
1 (16 oz) can crushed tomatoes
2 TB spoons tomato paste
2 TB spoons olive oil
Salt to taste
  1. Heat oil in a dutch oven or aluminum pot, add chicken and brown it on high heat for 2-3 minutes, stirring to make sure it turns golden brown on all sides;

  2. Add onions and peppers, mix and sauté on medium heat with open lid for 5-8 minutes or until onions are translucent;
  3. Add both diced and crushed tomatoes plus tomato paste, mix, cover and simmer for 30 minutes or until chicken is cooked through on medium-low heat, stirring to prevent burning;
  4. Add fresh herbs, cover, turn off heat and let stand for 5-10 minutes before serving;
  5. Serve with bread or boiled potatoes, or fire extinguisher!

February 15, 2011

Got Adjika?

Valentine's day is over. Chocolate is eaten, obligations are paid. Now back to normal life :)

Today, I'm sharing this simple salad I came up with by combining small red beans, onions and Adjika. Adjika is a national condiment of Abkhazia, a beautiful, now independent country stretched on the Northeast coast of Black Sea.

Many people know of Adjika as a tomato-pepper-herb paste. It could be hot, medium or mild. Actually, real adjika does not require many ingredients, but red chili peppers, herbs- cilantro, parsley, dill (if you find taragon it would give it a nice flavor, but my supermarket didn't have it)- and garlic. Now that it's winter and fresh red chili is not available in this neck of the wood, I used soaked dried chili. I usually dry them myself, but they could be found in Spanish/Mexican section of your supermarket. You can adjust the heat by removing or keeping seeds in the pepper.

Adjika goes good with almost everything, especially meat dishes. But since many of you probably had a heavy feast on Valentine's, I decided to make something light and healthy--small red beans salad.

◊◊◊
Red Beans and Onion salad with homemade Adjika

For Adjika:
a handful (about a cup) of dried red chili peppers, soaked in boiling water for at least 1 hour
a handful (about a cup) of mixed fresh herbs: cilantro, parsley, dill
3-4 gloves of garlic
1/4 cup olive oil
3 TB spoons red wine vinegar
pink of sea salt

For the salad:
8 oz small read beans (or kidney beans), cooked
1/2 medium red onion, sliced
salt to taste

  1. Cook beans: if you can soak them overnight in quadruple amount of water, if you forgot to do that, bring beans and water to boil, take off the heat, cover and let soak for at least 2 hours. After soaking, drain and rinse again.
  2. Cook beans in the same amount of water (at least 1 to 4): bring to boil, add a pinch of salt and cook over medium heat for 1/2 an hour. Don't overcook the beans! In case you don't feel like cooking beans, go ahead, use canned ones, but don't forget to rinse them well. Set aside.
  3. Slice onions, put aside.
  4. To make Adjika, combine all the ingredients in a a food processor or blender, blend until all combined. Transfer Adjika in a glass jar and close with lid. You can keep it in a fridge for couple of month.
  5. Combine cooked beans and onions and dress the salad with 1/2 of the Adjika. If it's not too hot for your taste, add more. Toss and serve over some salad greens if desired or as a side dish.
It might not be your average aphrodisiac but this simple dish will surely give your taste buds a sensual feast!

February 09, 2011

Drunken Redhead

I am not talking about an individual. I'm talking about a red leaf cabbage. I wonder why they called it "red" when, in reality, it is of a gorgeous purple color! Never the less, being a redhead lead this crunchy vegetable to my Red ingredients list for this month.

The red cabbage is a bit more tough comparing to its blonde sister, the leaves are a bit more stiff and more tangy to taste. I wonder if it's the same with redhead/blonde girls? I can't tell—I'm a brunette :)

So to tame this shrew, I decided to make it drunk. I remembered a method to soak the cabbage used by Georgian cooks—not from state of Georgia, but a country in South Caucasus. They use red wine vinegar and boiling water, but add beets to color the white cabbage red. In my case, I already have a rich color hue, so no beets this time. Also, by adding the vinegar, instead of just cooking the cabbage, keeps the color so bright.

To shred the cabbage you can use mandolin, or a very sharp knife—that's what I used since I don't have a slicer (yes, it's on my wish list!).

I decided to brake the cabbage's purpleness and tanginess with sweet green peas. Green just looks so good on purple. And I added sautéed red onions (which could be sliced with mandolin as well)
◊◊◊
Drunken Red Cabbage And Peas Salad

1 medium cabbage (about 2 1/2 lb), shredded
1/2 teaspoon dry cayenne pepper
1 dry red chili pepper
2 TB spoons red wine vinegar
2 quarts boiling water
1 medium red onion, sliced
1 cup frozen peas, thawed
2 TB spoons oil for sautéing onions
Sea salt to taste
  1. Put shredded cabbage in a heat resistant bowl, add cayenne, chili, vinegar and pour boiling water over it. Keep in a warm place for at least 2 hours.

  2. Drain water, preserving couple of TB spoons of water. Divide cabbage in 2. Put one half in a jar, pour preserved water, cover and store in a fridge. It can be used later for more salad.
  3. In a salad bowl combine remaining cabbage and peas. Toss.
  4. In a skillet, heat 2 TB of olive oil, add onions and sauté until they turn translucent. Pour the onions over the cabbage, toss and serve sprinkled with sea salt.
To make this salad is much easier then it seems. I hope this salad will find a special place on your dinner table. Remember, it's made with Redhead!

February 01, 2011

The beet of your heart

I chose the beetroot for the first day of February for a reason. February is proclaimed a Heart Health month by American Heart Association. Read on and you will see why.

One can write an extensive thesis on medicinal propertied of this gem colored vegetable. It is recommended for prevention and treatment of anemia, hypertension, and other cardiovascular diseases.

Dark-colored varieties of beets help strengthen the capillary walls. Substances contained in its root have vasodilator, antispasmodic, anti-sclerotic and soothing effect. In addition, they facilitate the allocation of the excess fluid from the body and are needed for normal functioning of the heart. Beetroot shape itself resembles this vital organ!

Beet root crops contain 14-18% dry matter, 11-12% sugar, 1.7% protein, 5-17 mg of vitamin C. The beets also contain a small amount of carotene, vitamins B1, B2. But what gives this vegetable a special value is vitamin P, which can increase the elasticity of blood vessels, prevent multiple sclerosis and internal hemorrhage.

In addition, beet is useful for the liver. Contained in this vegetable betaine—which is also a natural dye—activates the liver cells and prevents their fatty degeneration. Beetroots contain significant amounts of pectin, which protect the body from exposure to radioactive and heavy metals (lead, strontium, etc.), contribute to the removal of cholesterol and inhibits growth of harmful microorganisms in the intestinal tract. Salts of iron, calcium, magnesium, and phosphorus, cobalt found in beets also activate the blood formation and regulate metabolism. In iron content, beets trail only to garlic.

Among all other things, beetroot is rich in organic acids that are useful for human body: malic, citric, and tartaric. It also contains minerals such as phosphorus, calcium, sulfur, and sodium.

And let us not leave out the leaves. Beet leaves contain about the same nutrients as the root, but the beet tops have more vitamin C, although less fiber.

Today, I prepared a simple lunch recipes: beetroot soup-puree—although the most traditional soup in this category would be Borsch, but its recipe I will share separately!—and pies with beet leaves and cheese.

This soup is borrowed from Turkish cuisine, where it is traditionally made from roasted beetroots.

◊◊◊

ROASTED BEET SOUP

6 medium beetroots
2 TB spoons vegetable oil
1 TB spoon unsalted butter
1 cup diced white onions
1 cup chopped carrots
1 cup chopped celery
2 t spoons ground cumin
1/2 t spoon ground red hot pepper
1 t spoon ground black pepper
1 t spoon sea salt
1-2 dry bay leaves
6 cups water or broth
bunch of fresh dill weed
sour cream (or Greek style yogurt)

  1. Heat the oven to 375°F, wrap each washed and patted dry beetroot in aluminum foil and bake for 1 hour. Remove from the oven—beets have to be tender but not overcooked—cool, peel and chop into disks.
  2. In the pot, heat oil and melt butter in it. Add the chopped vegetables: onions, carrots, celery, garlic, and sauté them for 5-7 min or until onions are translucent.
  3. Add spices (besides salt) and beets; mix and pour water or broth and bring to boil. Once boiled, add salt, turn the heat to medium-low and cook for 30 minutes.
  4. Remove from heat, take out the bay leaves, and blend with an immersion blender. Return to heat for 10 more minutes.
  5. Serve with dollop of sour cream (or yogurt) and chopped fresh dill weed.

~~◊◊◊~~

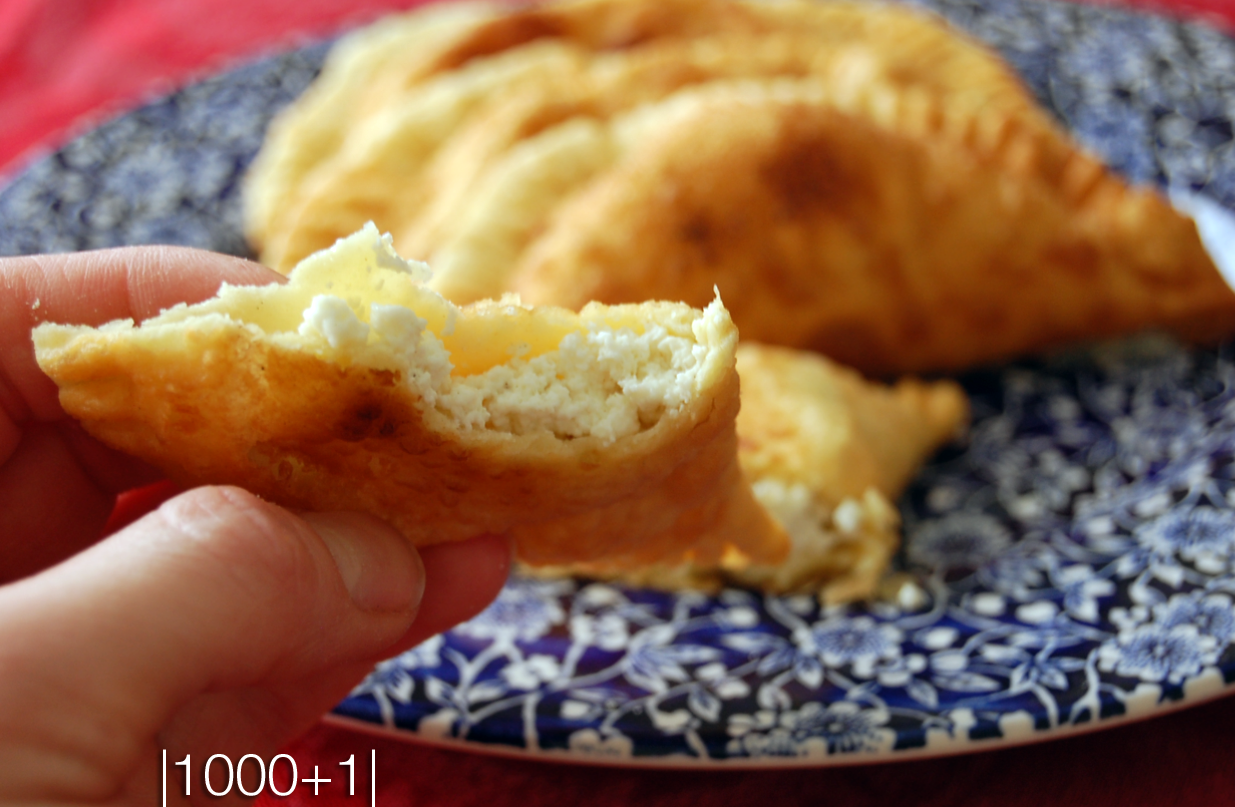
Beet leaves and cheese pies—tsakharadhiin—are traditional Osetian dish. Osetins are one of the indigenous people of North Caucasus region, and I'm 1/8th Osetian (I know it's totally irrelevant).

You may use already prepared yeast dough or buy frozen bread dough and thaw only one loaf, but I deiced to make my own using whole wheat flour; and instead of butter I used clarified butter—it gives sweet note to the pies that compliments saltiness of the cheese and tartness of greens.

Traditionally, Osetian cheese that is similar to Greek feta is used. However, Greek feta works just fine! This recipe yields 3 10 inch pies: it is Osetian tradition to bake three round pies at a time. And to serve it with sour cream and dill dip. Only I used Greek style yogurt in lieu of sour cream. I used the same dip with the beet soup, too.

◊◊◊

TSAKHARADJIN—OSETIAN BEET LEAVES AND CHEESE PIE

For the dough:

1 TB spoon dry active yeast
2 cup warm (100-110F) water, divided
1 t spoon sugar
1 TB spoon vegetable oil
1 t spoon salt
2 cups whole wheat flour
1 1/2 cup barley flour, divided (or all purpose flour)
+more for dusting the surface

For the filling:
2 cups beet leaves
1½ (20 lb) pounds feta cheese
One bunch of scallions
1 cup chopped fresh dill weed

For serving:
½ cup clarified butter (or melted butter)
Sour cream (or Greek style yogurt) with chopped dill weed

To make the dough:
  1. To 1 cup of warm water, add yeast and sugar and without mixing let stand for 10 minutes.
  2. In a bowl with 2 cups of whole-wheat flour and 1 cup of barley (or all purpose) flour, pour the water, oil, and salt; mix the sponge with a wooden spoon.
  3. On dry clean surface pour 1/2 cup of barley (or all purpose) flour, take the sponge and knead the dough until most the flour is used up; dust the dough with flour and put it back into the bowl, cover with clean kitchen towel and let stand in a warm and non drifty place for and hour. Meanwhile, prepare the filling.

To make the filling:
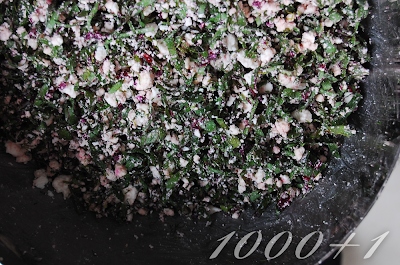
  1. Wash and dry the beet leaves and shop them into thin ribbons; mix it with finely chopped scallions and dill.
  2. In a separate bowl crumble the cheese, then add the greens and black pepper.
  3. Divide the filling into 3 parts and roll into ball shape.

To assemble and bake the pies:
  1. Preheat the oven to 450°F and keep cast iron skillet (of metal baking sheet) inside the oven to be heated, too.
  2. Divide the dough into tree parts. On a dusted with flour surface roll the dough with a rolling pin or stretch with hands into circles about 7/8 of an inch thick.
  3. Put the filling in the center of the dough, push it in, and gather the dough from around the edges closing in it on top. Pinch off any excess dough. With hands even out the pie. Push it into shape (10 inches in diameter) and poke a hole 1 inch in size in the middle.
  4. Transfer the pie on a hot skillet (baking sheet) and bake for 15-20 until it starts to turn light brown.
  5. Brush the pie with butter. Repeat for the second and third pie.
  6. Serve hot, cut in 6 pieces, with a sour cream (yogurt) and dill dip.

I understand that this time of year many people would prefer chocolate as their main ingredient not only because it makes a nice valentine day treat but also because its dark varieties are good for the health. I understand also that beet might not win competing for a place on your table this month because it might not look so attractive. But have you seen or tasted Cocoa au naturelle? Right, now beet doesn't look so bad!
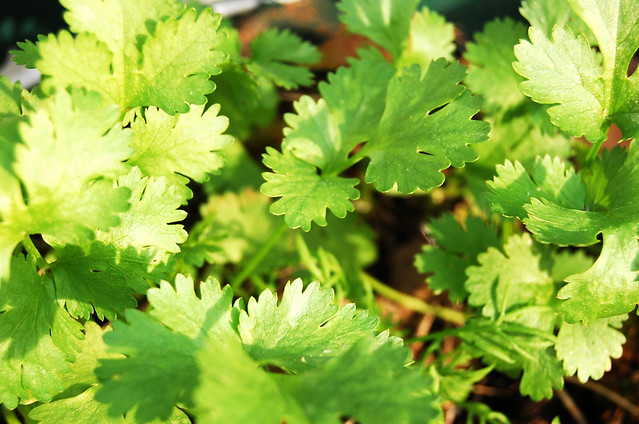
January 18, 2011

Pasta: Adyga Millet Spoon Bread

Despite its name, this dish has nothing to do with macaroni or even Italian cuisine. This is the bread of my people- Adyga [pronounced: ah-dyh-ga], or else known Circassians. It is an ancient recipe that our forefathers, or rather foreMOTHERS were making for ages.
The grain used is millet. It is wide known as fodder, but it is totally suitable for humans! And it's full of nutrients, too! Packed with proteins and vitamins, such as vitamin B, niacin, B6 and folic acid, minerals such as calcium, iron, potassium, magnesium, and zinc, it contains no gluten and although it could not be used for regular breads, it could easily replace any grain in your pantry.
Circassians had been cultivating this grain perhaps for as long as the history knows of them. They used it in soups, as breakfast cereal and to make this unique bread- Pasta, which was served with practically everything: meat dishes, poultry, cheese...
Regardless of its deep rooted history, this dish is very easy to make. There are very few ways to cook Adyga Pasta, but they all call for not more than 3 ingredients: water, millet and flour. I cook it without any flour. Note that pasta is never cooked with salt! The hardest part of cooking pasta is the cleanup!

Adyga Pasta
1 cups Millet picked and rinsed in cold water
3 cups water
Hand pick millet for any unhulled grain, wash with cold tap water and drain. Use a hard anodized stock pot (or any pot you use to cook rice in, but not Tefal), pour millet and water, cover and bring to boil over hight heat. Once boiled, take the top off, lower the heat to medium and cook for about 30 minutes or until grain is all cooked and most of the water is evaporated, stirring with a wooden spoon (if you don't stir, pasta will end up on the floor!). If water evaporates before the grain is cooked, add 1/4 cup more at a time until millet is cooked. Remove from the pot into a pan (I used lasagna pan) and tamp down with a wooden spoon or wet hands. I personally prefer hands! (beware, it is hot) Let cool. Usually when it cools down a crust appears on top. Usually it's not edible. To avoid it, cover pasta with a layer of cling wrap while it's still warm. Once cooled down, cut pasta into 2 inch strips and serve warm or cold.