If I inspired you, I've done my job!
Showing posts with label dessert. Show all posts

October 02, 2011

Golden Delicious. Golden & Delicious!


This last Saturday we finally got a chance to go apple picking. Every year we pilgrimage to an apple orchard near by, sometimes several times during the apple picking season. Alas, not this year. Due to the constant rain and literally outflowing problems we were only able to take a trip to the Northhampton county for the first time this past Saturday, October 1! Despite the more than 50/50 certainty of rain, it was a nice overcast day bracketed between this never ending rain. So we took advantage to set off on a delicious adventure, Golden Delicious!

We climbed and jumped down, ran around and sampled fresh air and apples and brought home tons of crispy Gold Delicious, which are abundant this time, and some bumpy Red Delicious as well.

So it is obvious that I will be writing about apples this month, or rather about apple recipes…

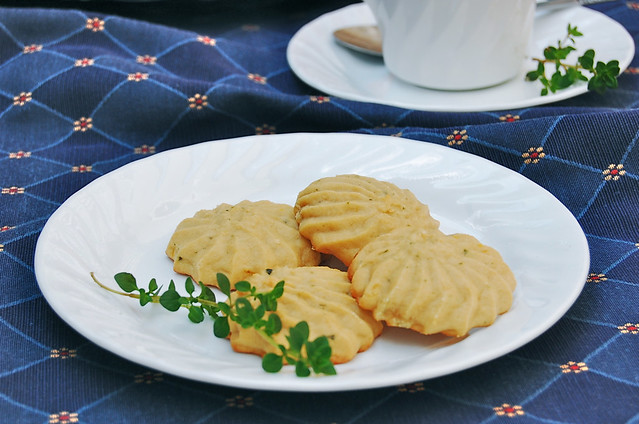
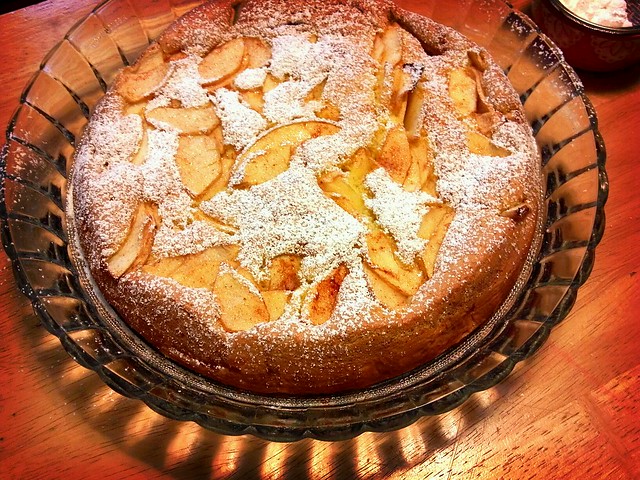
And let me start with a dessert: thinly sliced baked apples resting on a vanilla cloud…

It is called Charlotte. No, I didn't give it its name. I have no idea why it's called this way, and I don't feel like doing any research, since I already know all I need: it is a quick and easy delicious dessert recipe!

By adding some cinnamon I adjusted a popular version a bit. The preparation is very quick and takes way less time than to type the recipe here…

◊◊◊
~Charlotte~ An Apple Dessert

2 medium golden delicious (or any sweet variety) apples
some lemon juice
1 t spoon cinnamon
4 large eggs
1 t spoon vanilla extract
1/2 cup white granulated sugar
1/2 cup all purpose flour

1 T spoon butter for preparing the spring pan
+some more flour for dusting

1 T spoon confectioner's sugar, if desired
  • Peel, core and thinly (≈1/4˝) slice them. Drizzle the lemon juice over the apples to prevent from browning and then sprinkle with cinnamon.
  • Preheat the oven to 400°F. Butter the spring form (or any other dark* cake pan) and dust with some flour. You might avoid it altogether if you're using non-stick baking spray, I don't use it and don't recommend, but if you're accustomed to it, go ahead…
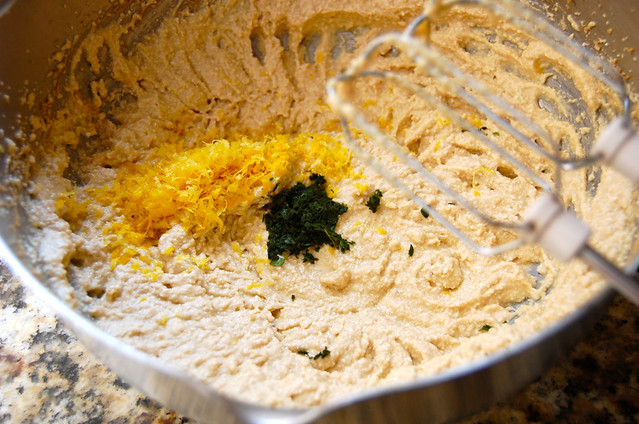
  • In a bowl, beat the eggs+vanilla until they foam, for about 3 minutes on high speed. Gradually add the sugar, continuing beating but now on a medium speed. After all the sugar is added, beat for another 2 minuted on a high speed.
  • Turn the mixer off, sift the flour into the egg mixture. Slowly beat it together until all combined.
  • Pour the batter into prepared pan, top with apples and bake for 30-35 minutes or until inserted into the center toothpick comes out clean. Cool.
  • Dust with some confectioner's sugar if desired…
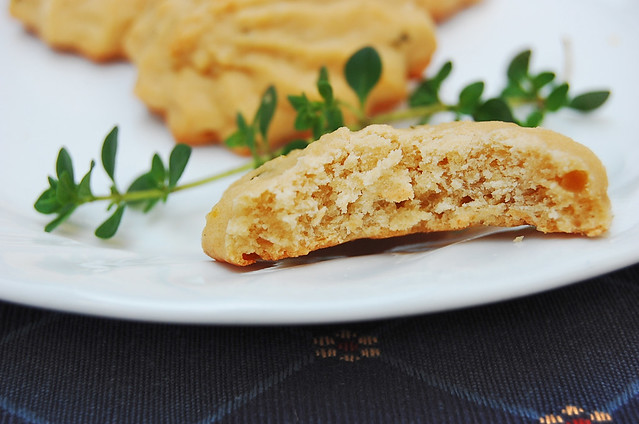
Enjoy this deliciously golden and easy dessert!

*The time is for a dark metal pan.

May 31, 2011

It's About Thyme…

…I made some cookies! With thyme…
May is bidding good-byes now, promising us lazy days of summer. So does my mini-series of recipes with herbs. I hope it inspires you to grow your own herbs, in the garden or on a window cill, and use them fresh every day, for breakfast, lunch and dinner, turning your creations into a work of art, both tasteful and healthy. Truth be told, I haven't covered all the herbs out there, but hopefully the idea of using herbs passes on.

Having presented mainly savory dishes, I'm now off to dessert: cookies!

I got this idea first from my Savory Baking book. It was a recipe for Thyme and Lemon bars. Thyme and lemon is such a classic flavor combination! But I wanted to make something sweet. Then, I came across a recipe from a Russian food journal. It was a recipe for a cookie made with farmer's cheese and lemon. So I married these two to create my own variation.

I didn't use farmer's cheese, it is a bit overpriced rather than being overpraised around here. Thus, I used good 'ol whole milk Ricotta. Plus, I tuned down the lemon flavor and cranked up the thyme! The cookies came out soft and very flavorful, but not too sweet.

◊◊◊
Thyme Lemon Ricotta Cookies
Makes about 4 dozen cookies
WET
1 stick {4 oz} of unsalted butter, softened
2/3 cup packed brown sugar
2 large eggs
1 container {15 oz} whole milk ricotta cheese

zest of 1 medium lemon {1 T spoon}
handful of thyme sprigs {10-15}
leaves stripped and mushed with mortar and pistil to make about 1 T spoons

DRY
2 1/2 cups AP flour
1 t spoon baking powder
1/2 t spoon salt

  • Preheat oven to 375° F
  • In a bowl, beat butter with sugar with an electric mixer until creamy, about 3 minutes on high speed. Beat in eggs, one at a time.
  • Add ricotta and continue. Then add lemon zest and thyme. Mix it all well with the mixer for another minute.
  • Add dry ingredients, mix the batter. The batter should be soft and creamy.
  • Place half of the batter in a pastry bag with a cookie tip and squirt about a table spoon on a prepared cookie sheet {lined with silicone liner or parchment paper} leaving 1 inch in between. Or, just spoon the batter with a spoon.
  • Bake for 15 minutes or until they turn lightly brown.
The May may be over, but the herbs are still growing, so don't forget to add them to your list of ingredients.

April 30, 2011

Black and White

I often hear that life is a black and white pattern. One black stripe is followed by a white one. Lately, I have been fallen into this pattern and could only perceive the world around me as an old noir broken down into black and white lines.

But have you ever noticed how striped patterns tend to opalesce with opulence of colors through camera lens or TV screen? I think sometimes to see the colors in life and break monochromatic rhythm of black and white all we need to do is to zoom out, look at it from afar. And let the black and white stripes shine with interference of new colorful patterns.

Often we inclined to think that if it's not black than it's white. For example, if we don't know how to do something, we rather disregard it as something difficult without even making a single attempt. But most of the times all it takes is to step out of this Black&White pattern, zoom out to see if there's any grey, and later colorful area.

My intend here in not to teach of preach, but to give creativity a chance. Even if it comes to such simple and everyday task, such as cooking a meal or a favorite treat. Just look around: almost on every package there are myriads of interesting and inspiring ideas longing to be embodied. Once you unleash your creativity it will bloom and bring the sweetest fruits that will fully satisfy the hart and the soul.

My husband learned baking cookies by reading the recipe on the back of the chocolate chips package. After a while he let himself be more creative and added second kind of chocolate chips—white chocolate. That was a huge success with kids. Thus the Black&White Chocolate Chip Cookie was born…

I took the idea of Black&White further a bit and mixed up two kinds of flour: 'black' whole wheat and 'white'—all purpose. Just for the fun of it!

◊◊◊
Black and White Chocolate Chip Cookies
Makes 1 1/2 dozen large cookies
WET
1 cup butter (2 sticks) softened
2/3 cup white sugar
2/3 cup brown sugar
2 large eggs
1 t spoon vanilla extract

DRY
1 1/4 cup white all purpose flour
1 1/4 cup whole wheat flour
1 t spoon baking soda
1 t spoon salt
6 oz semisweet chocolate chips
6 oz white chocolate chips
  • In a bowl, beat butter with sugar until creamy, for about 2 minutes on high speed.
  • Add eggs, one at a time, then add vanilla extract continuing beating to combine.
  • Slowly add both flours, soda and salt, mix until all combined.
  • Finally, fold in chocolate chips. Cover the batter and refrigerate for at least 2 hours.
  • Preheat oven to 350°F, spoon about 1/4 cup (big cookie scooper) of batter onto an ungreased cookie sheet, 2 inches apart.
  • Bake for 12 minutes, cool on a cookie sheet for 5 minutes then transfer to cooling rack to cool completely.

Pour a glass of cold milk and sink your teeth into a freshly baked big cookie. A perfect Black&White snack!

March 22, 2011

Banana NOT Cookies—Scones!

Banana nut bread was one of the first recipes I've tried when I braved to bake for the first time. I'm still learning this mathematically meticulous science—yes, cooking is art, baking is science—but I do sometimes venture to mash up different recipes to make my own creations.

This time I've decided to make banana nut cookies. I merged the recipe of banana nut bread with a recipe for cookie and set off to bake them. Little did I know that I miscalculated flour and the size of the cookies—they came out of the oven looking like scones. And we liked them!

◊◊◊
Banana Nut {Not Cookies} Scones
WET:
1 cup brown sugar
2 sticks of unsalted butter, softened
3 over ripen bananas, mashed
(I cut a tip off and squeeze them like from the tube)
1 teaspoon vanilla extract

DRY:
3 1/2 cups all purpose flour
1 teaspoon baking soda
1/2 teaspoon salt

1 cup chopped walnuts
  1. In a bowl, beat together butter and sugar until creamy, add bananas and vanilla and mix it all well;
  2. In another bowl, combine flour with soda and salt;
  3. Add dry mixture to the wet and mix all until well combined (about 5 minutes on high). Then fold in the nuts;
  4. Refrigerate the batter for few hours, overnight perhaps if you're want to bake the scones for breakfast;
  5. Preheat oven to 350° F and line a cookie sheet with parchment paper or silicone mat;
Scoop on a prepared baking sheet, about 1˝ apart and bake in the preheated oven for 25-30 minutes or until the toothpick comes out clean.
I was a bit chewed up that the cookies didn't melt, but I gladly chewed the doughy scones up instead!

March 21, 2011

Greatest gift of all

11 years ago I accepted the greatest gift that life has given me. Although I was scared and uncertain of what to do with the gift, I gladly took it into my hands. And I never want to let go.
11 years has passed like galloping wild horses, I'm still holding this gift close to my heart, as I forever will.
11 years taught me something I will never be able to forget: how to share myself with another, how to multiply my love by dividing my heart, how to be patient, selfless and how to set my priorities.
11 years ago I became a mother for the first time.
~◊◊◊~
Of all the treasures in the world
That could fall
Down to my feet
Most wonderful God had bestowed
It's you, my daughter,
You, my sweet!
~◊◊◊~
One year ago, I made this cake for my daughter's birthday. We were remodeling our kitchen and I didn't have an oven. Only a cook top. I was determent not to make this little obstacle to stay in a way of a home made birthday cake. You see, one of the best part of becoming a parent, you develop a problem solving skills. So I came up with a pancake layered strawberry short cake. It was good, to say the least. I might seem like a lot of work, but in reality it isn't and it worth the effort.

◊◊◊
Strawberry Short Pan Cake

1} Pancake mix:


WET

3 3/4 cup buttermilk

3/4 cup vegetable oil

3 eggs

3/4 cup white sugar

2 teaspoons vanilla extract

DRY

3 3/4 cup all purpose flour

1 Tb spoon baking powder

1 Tb spoon baking soda

  1. Mix WET with an electric mixer in on bowl, mix DRY in a sifter, mix WET and DRY together and beat until incorporated.
  2. Ladle about a cup of the batter on a hot, non-stick skillet, fry on med-high to prevent burning until it bubbles; flip and fry while cooked through.
  3. Repeat until you run out of batter. Stack the giant pancakes and make filling.

2} Cream filling:


8 oz heavy/whipping cream

8 oz confectioner's sugar

a drop of red food coloring (if desired)


Whip cream with an electric mixer in a clean bowl until peaks form then, slowly add sugar, continuing to whip and finish up with food coloring. That's all!

3} Assembly:


Few tablespoons of good quality strawberry jam
Handful of fresh strawberries, sliced lengthwise
{I use my egg slicer for perfect strawberry slices}
  1. Smear generously strawberry jam on the first pancake, cover with the second one; smear generously whipped cream on top of the second pancake, cover with third; smear generously strawberry jam on the third pancake; cover with the forth, repeat...
  2. Last pancake should be covered with whipped cream and crowned with sliced strawberries. Keep the cake and/or leftovers in a refrigerator.Many things changed since last year—we finished our kitchen and of course now I have an oven and all, but one thing will come back—this wonderful cake! I'm off to make it!

February 21, 2011

Cookie, please

Just when we thought we won't see snow again, winter decided to remind us--it is still February! More snow is here. Well, let's put the kettle on, brew some Earl Grey and enjoy it with some delicious home made oatmeal cookies that are good enough to eat for breakfast!

I usually use the recipe on the back of the lid of the Quaker Oats can. The recipe is called "Vanishing Oatmeal Raising Cookies". Only in our house they do not vanish unless I eat them: nobody likes these, especially after my husband started to make his chocolate-chip cookies. I, for one, rather eat oatmeal ones.

But they got boring. A little. So I tried something different. Instead of raisins, I used dried cherries; I added 1/2 cup of white chocolate chips in lieu of white sugar and omitting vanilla extract (since the chips already have some flavor) I added lemon zest. Turned out delicious! Now these were vanishing right before my eyes--everybody loved them!

◊◊◊
Really Vanishing Oatmeal Lemon Cherry Cookies

DRY:
1 1/2 cup all purpose white flour
1 t spoon baking soda
1/2 t spoon salt
3 cups plain quick oats

WET:
2 sticks unsalted butter (1/2 pound) softened
2 whole large eggs
1 cup firmly packed brown sugar

2 T spoons lemon zest (from 2 medium lemons)

1/2 pound dried cherries
1/2 pack (1 cup) white chocolate chips

  1. Heat oven to 350°F.
  2. In a bowl mix together DRY ingredients: flour, baking soda, salt and oats, mix with a wooden spoon.
  3. In another bowl, mix WET ingredients: butter, eggs and sugar and beat until creamy with an electric mixer on medium speed for about 2 minutes. Mix in the zest
  4. Combine both DRY and WET and beat for about a minute until all mixed together. Fold in cherries and chocolate chips.
  5. Spoon batter by tablespoonfuls onto ungreased cooking sheet and bake in pre-heated oven for 12-14 minutes or until golden brown.
  6. Remove from the oven, let cool on a cookie sheet for 1 minute then transfer to a wire rack to cool completely.
  7. Enjoy with a cup of fresh brewed tea.
There's an Arabic saying: February comes with no shoe laces tied. But spring will tie them before we know it!

January 12, 2011

Staying Warm and Cozy

Kids were off today. Wind had subsided. Snow was still falling, making everything sterile and quiet. I love this kind of winter weather, especially when I’m inside with a cup of warm freshly brewed tea, and a bread pudding in the oven, filling the air with vanilla sent.

This morning resembled a winter wonderland and I was inspired to make something cozy and slow for breakfast. We had bought an imported Italian cake yesterday and still had some left overs. Three quarters to be exact.

This particular cake, named Panettone, coming all the way from Italy, is already a bit dry when you buy it and keeping it for later didn’t appeal to me for it will only get harder! So, I used it in lieu of plain bread to make bread pudding: “Pane” in Panettone is Italian for “Bread”. Usually this cake is made with raisins, cranberries, or orange peel, but the one I had was plain. I used my own dry fruit and walnuts for the pudding, making this recipe is another Tutti-Frutti breakfast!

{5}Panettone Bread Pudding with Dry Fruit and Walnuts

Panettone cake, cut in 1 inch cubes

4 whole large eggs

1 cup milk

1 cup heavy cream

¼ cup white sugar

pinch of salt

½ cup chopped walnuts

1 cup mixed dry fruit

Some confectioner’s sugar for serving (optional)

1. Heat oven 350°;

2. Arrange chopped bread, dry fruit and walnuts in a baking dish (lasagna pan will do);

3. Beat eggs in a bowl with sugar and salt, add milk and cream and mix it all until combined. Pour egg mixture over cake;

4. Bake for 40 minutes or until the toothpick inserted in the center of the dish comes out clean;

5. Serve in a bowl dusted with a little bit of confectioner’s sugar.