If I inspired you, I've done my job!
Showing posts with label snack. Show all posts

March 19, 2012

Playing Tag With Time & Fa-va-falafel Balls

What a beautiful weekend it was. Weather was unusually warm but much welcomed and appreciated. Everything seemed to pick up its pace. The Robins had arrived and were scavenging for early inch worms and communicating with each other in their melodic language. The buds started to look engorged and about to burst with new life. Even the Pussy Willow let out its shining silver paws. All were awakening. Time too soon?

I just can't seem to catch up with time. It's as if we were playing tag with it, running on a circle. As soon as I finish something and try to catch my breath, I feel the time's sly smirk on my back: I'm going to tag you now! I lost count of the laps it has ahead of me, and I think at this point I should exit the game. I am not a quitter, just trying to catch my breath…

Thus I'm a little late for a Meatless Monday then planned—and you will see why—I am still going to post this recipe today.

One of the questions from last's week Food Revolution's Twitter Party has stuck in my head. What would you grow if you can only grow one vegetable? My answer: beans. Just look at this amazing family of sprouts: there are so many varieties, they are growing almost in any climate and most of all, you can harvest them green or fully grown. Magic beans…

[I'm sure many have heard aforementioned words from me many times as I defend my vegetarian eating habits]

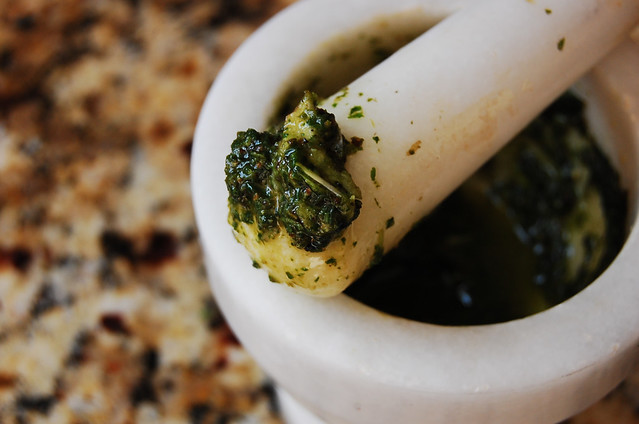
Today's magician: Fava Bean. Or Broad Beans, if you like. This miniature potato-looking-like variety usually grows in warm climate and is very popular in North African, Middle Eastern and Mediterranean cuisines. In Europe it has been served as a first spring vegetable when harvested in a pod, which becomes uneatable as it matures.
Full of vitamins, essential elements as its legumes cousins, this lumpish bean has one problem: it needs a lot of attention when preparing. May be that's why it is widely replaced with its more outgoing family members.
That's why I regret not posting the following recipe earlier, so if you decide to take a chance of Fava on Meatless Monday, you have time to give these smiley faces a proper attention.

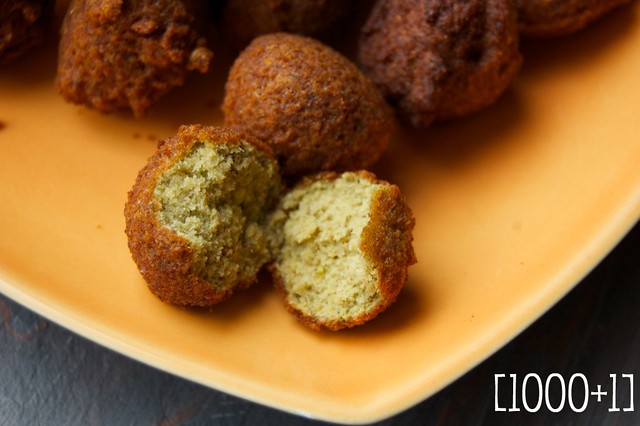
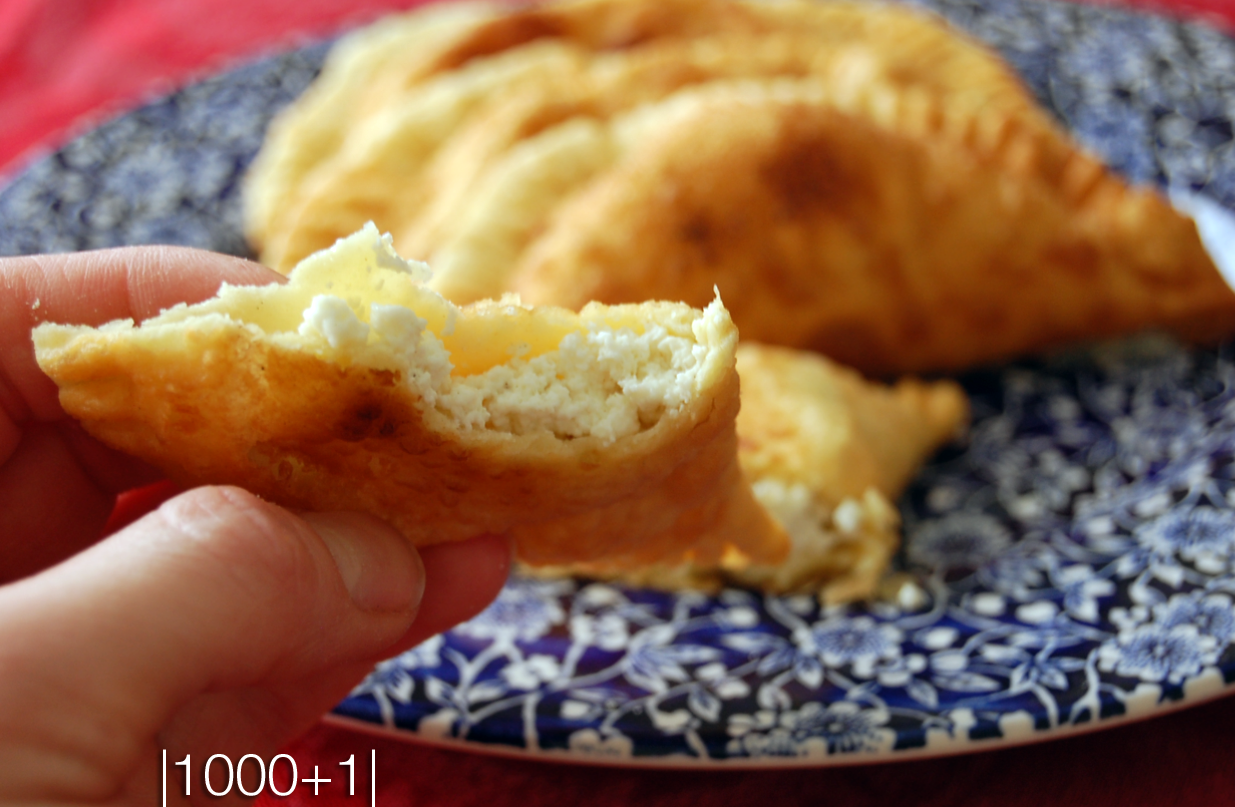
And today I'm sharing an old time FAVArite of mine: Falafel. A perfect multi-tasker dish: you can eat it as a snack, plop it in a soup, toss with a salad or simply envelope it in pita for a tasty sandwich wrap. Oh, and it's a nice appetizer piece served with some creamy dip when you entertain!

You know, I like multi-taskers [by the way, it's not my term but of Mr. Alton Brown] and I used another one–a cookie scoop–to drop the batter into the hot oil. Hence, my falafels came out like balls, not like customary disks that created using a special falafel spoon [I never even seen one in person!]

Although this particular dish can be created with other beans, I prefer using fava beans. See, you need to shell each bean after soaking and believe me, this is where the size matters and the bigger the better, or the easier!
So soak your mature dry Fava overnight and let's begin. [Good news: you don't have to cook the beans after soaking]. When I first made falafel, I did cook the beans and ended up with a mush instead of batter!

◊◊◊
Fava Bean Falafel Balls
Makes about 5 dozens
1 lb dry Fava beans, soaked in cold water overnight, peeled
2 t spoons coriander seeds
2 t spoons cumin seeds
2 t spoons peppercorn mélange [or just black peppercorns]
2 t spoons coarse sea salt
1 large onion, cut into chunks
3 cloves garlic, smashed
a handful of fresh cilantro, torn
1 t spoon baking soda
1 t spoon baking powder
4 T spoons rye flour [I used rye for extra flavor, you can use regular all purpose]
Vegetable oil [or any light, low heat oil for deep frying will do] about 2˝ in the frying pan
Equipment:
Food processor
Cast iron skillet
Small cookie scoop

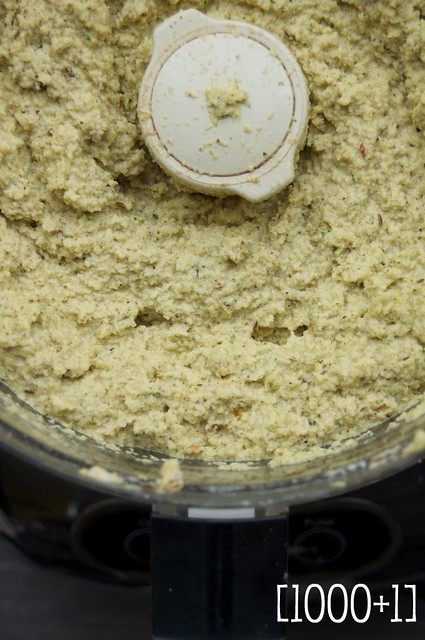
  • In a food processor combine all ingredients [-] oil and process for up to 8 minutes until it is all chopped and of even consistency;

  • Heat oil to 350° F. Scoop falafel mixture into hot oil, one at a time. Do not overcrowd the pan. [I fried 12 at a time] and fry for about 5 minutes or until falafel balls are golden brown and float up to the surface. Repeat with the rest keeping the oil temperature at 350°F;


[If you don't want to use up the whole batter at the time, cover it with an air tight container and refrigerate up to a week, or freeze it in a freezer zip lock bag for up to a month]
  • Serve warm as an appetizer with some dipping sauce [plain yogurt with some crackled pepper] or use for salads, soups,  and wrap sandwiches.

What's your magic bean?

March 05, 2012

Just a Quick Afternoon Post

The sun was shining bright this PM and I was lured to go out into my garden to start "clean up" after snowless winter but I was deceived. It was still freezing out. But I could almost feel the Spring's fresh yet timid scent. So, after few deep cleansing breaths, I went back inside.

I wasn't planing on writing or photographing a post today but the same frisky sun beam that summoned me into the cold earlier was tickling my earlobes whispering some promises… I had to put it to use.

Making hummus today for Meatless Monday sandwiches I decided to take couple of shots in this bright sunlight.

So a new little blog post was born…
◊◊◊
Toasted Sesame Seeds Hummus
makes about 6 cups

1 pack dry garbanzo beans, soaked overnight*
3/4 cup water, reserved from boiling beans
1/4 cup lemon juice (juiced from one medium sized lemon)
3 T spoons tahini (sesame paste)
4 T spoons olive oil
1 t spoon sea salt
2 garlic gloves, crushed

Garnish:
1 T spoon sesame seeds, slightly toasted on a skillet for 2-3 min
1 T spoon olive oil

  • After soaking the beans, drain and rinse them. Transfer soaked beans to the same pot (8 QT will do), pour over fresh cold water to fill 3/4 of the pot, bring to boil, lower the heat to med-high and cook for about one hour or until the beans are no longer crunchy. Once cooked, preserve 3/4 cup of the liquid and drain the rest. Let beans cool.**
  • In a food processor, combine garlic, lemon juice, tahini, salt, water, olive oil and beans. Process for 5 minutes until smooth.
  • Transfer to a bowl with lid and refrigerate for a week. Use it as a spread with pita bread and vegetables or on a sandwich.
  • To serve, spread about 1/2 cup (or a cup; although a suggested serving size is 2 T spoons, in my house we eat it by cups) on a plater making little indentations. Combine toasted sesame seeds with olive oil and pour over the hummus. You can add some freshly ground black pepper, paprika or ground cumin if you'd like…

*If you rather cut the prep time, use 2 13 oz cans of garbanzo beans and boiled water. Skip the first step.
**You can prepare beans a day before and store it in the fridge, but no longer than 2 days.

Oh, and the promise from the sun beam was that the Spring will be here soon!

October 13, 2011

Easy As Apple…

…pie? No, apple pie is not THAT easy to make. This phrase should be: Easy as apple sauce! Because this tasty concoction, that usually bought from store, is very easy to make at home. All you need is some freshly picked apples, a little water and sugar+spice, if you want. And a pair or two of helping hands. That makes it perfect to cook with kids. Depending on the age, they can help you peel, core and slice the apples.

You will also need a roomy sauce pan, depending on how much sauce you are going to make. If you make extra, it can easily be stored in an air tight container in a refrigerator for weeks.

This recipe makes about 2 quarts of apple sauce.

◊◊◊
Easy Apple Sauce

6 medium to large golden delicious (or any variety) apples
2 T spoons brown sugar*
1 stick of cinnamon (or 2 t spoons of ground)
Some water
  • Wash, peel, core and slice apples (that's when you will need that extra set of hands)
  • Add water to the sauce pan to cover the bottom for about 1/2 inch, put it over the medium heat; throw in sugar and cinnamon
  • Start adding chopped apples, cook, stirring occasionally, until they all soft and mushed; takes about 20-30 minutes
  • You may mush them more, if you like it smooth; I leave it as it is for I like chunks…
*you might want to add more sugar if using sour apples.

That's all falks! Now pack some of this fresh yumminess into your lunch bag and enjoy!

May 02, 2011

HERBivores unite!

It is May! And may I say it is the best time to plant a garden outside. If you have limited time and do not wish to fuss with vegetables, plant herbs.

With each bite you will appreciate every little leaf or sprig of fresh herb for they take your cooking to a next level. They are not only an olfactory fantasy but a treat for your taste buds. Easy to grow, most of them are perennials, but when not, you can harvest the seeds for the next gardening year, or to use as spices.

You can use herbs in jillion of recipes, savory and sweet alike. Needless to say that eating fresh herbs will benefit you in many ways: boost your immune system, can cure ailments and conditions, and simply enrich your overall health.

Today in my garden and on my plate is oregano—the bright star of Mediterranean and Spanish cuisines. We are quite familiar with a pungent woody taste of its dried version in pizza and spaghetti sauces. But while using dry oregano during winter I surely enjoy it fresh from the garden all spring and summer long.

Growing wild in the mountains of Greece, oregano can root deeply almost anywhere as long as its leaves get plenty of sunshine. Dormant during the cold season, it is the first one to wake up in my garden. It is filled with goodness (from the web): {the leaves and flowering stems are strongly antiseptic, antispasmodic, diaphoretic, expectorant—I make tea by steeping 1 T spoon of dry oregano in 8 oz of boiling water for 3 minutes to soothe coughs—stimulant and mildly tonic}

I stumbled upon this lovely legend about oregano and I'd like to share it:
{A young servant to Cinyras, the king of Cyprus, was carrying a large vessel full of valuable perfume oils which the king was very fond of. He dropped the container by accident, spilling its content. The servant boy was so afraid of what his punishment would be that he fainted, and while lying unconscious on the ground where the oil had spilled, he turned into the oregano plant.}

I grow two kinds of oregano: Greek, with hairy, thicker leaves and Spanish, with smoother, thinner leaves. However, over the years of growing side by side the two mixed up and now it's hard to tell which is which. So I use them both together.

When using oregano, strip the leaves to chop and add to your savory dish. You can compost the stems, or use them to cook pasta and rice—just add the stems to water where you cook your favorite carbs, or use them when making a soup stock.

Oregano is at home with vegetable dishes as well as meat, poultry and fish, and dairy! Just don't overdo—then it turns bitter.

I'm sharing a simple marinade made with fresh oregano and complimenting it garlic. Use this marinade for grilled chicken, shrimp or even as salad dressing. You would need mortar and pestle to crush the fresh ingredients to release their essential oils. I love using this gadget, it feels so primal!

My brother came from Russia and brought a special treat from our region—smoked mata kway (milk cheese). So I used my oregano marinade to make this cheese snack. You can use any smoked soft cheese, such as smoked gouda.
The smoky flavor of cheese, the deep fresh flavor of oregano and the piquant kick of garlic flavor really sing in unison for this simple dish.
◊◊◊
Oregano Marinated Smoked Cheese
Handful fresh oregano (leaves and stems)=1 cup, washed and dried
1 glove of garlic, peeled
1 t spoon coarse sea salt
1 t spoon black peppercorns
1 small dried chili
1/4 cup extra virgin olive oil

16 oz smoked soft cheese
  • Combine oregano, garlic, salt, peppercorns and chili in a mortar and press with pestle until all the oils are released and it is all well mushed.
  • Transfer to a small mixing bowl and all the oil, whisk it together to combine.
  • Cut cheese into 1˝ cubes, pour marinade over and toss to cover completely.
  • Serve as a snack or a side dish.
Grow your herbs, eat your herbs, be a HERBivore! (stay tuned for more herbilicilous ideas)

March 30, 2011

Haliva—Circassian Pierogies

Strolling through the frozen isle in my supermarket, looking for ideas for my last Meltdown for March, hoping that the weather will melt down soon, too I came across pierogies. Right next to Polish pockets full of yummy I saw Chinese dim sum and egg rolls, Italian ravioli and even Turkish borek. Then I spotted Mexican empanadas, looking so sad with a frown next to frozen empanada dough disks. It dawned on me that there is variant unleavened dough wrapped around stuffing creations, fried or boiled, in almost any cuisine. I remembered our own—haliva. Whether fried or boiled—psi haliva, or with different stuffing—cheese, potatoes, meat—they are always a special treat!
I have heard that nowadays many cooks use frozen dough to make these hot pockets (oh, boy! now the jingle from the commercial ad for “Hot Pockets” is stuck in my head) and I agree that it is quite convenient. So why not make your own and freeze them?

Unleavened dough is very easy to make. All you need is water, egg, pinch of salt and flour. To be exact:
1 cup of warm water (102° F)
1 teaspoon salt
1 large egg
3 ½ + cups all purpose flour (you can use white or whole wheat)
  1. Put salt in the water, add egg and mix it all until well combined;
  2. On a clean dry surface pile up the flour, make a well and slowly pour water+egg mixture with one hand, starting the dough with the other;
  3. Knead the dough until semi-soft and smooth, cover and let rest for about half an hour for gluten to set.
Roll the dough in batches to 1/8˝ thick and cut out circles 5 ½˝ in diameter—I used a top of a small sauce pan.
This recipe yields about 50 disks 5 ½˝ in diameter. You can make these shapes smaller or bigger, depending on how you are going to use them. We like bigger size for fried halivas. Layer parchment paper in-between the disks or flour them generously and freeze them up to one month in a zip lock bag, 10 per each package. When needed, thaw the disks at room temperature for about one hour in the bag.

Unleavened dough is very versatile. You can stuff it and fry, boil or bake. You can make ravioli, tortellini, pierories, pelmenis, empanadas, dim sum, egg rolls, manti, borek, haliva and you can even layer it to make a lasagne dish! Not to mention it makes yummy unleavened bread.

Since this time of the year for unleavened breads and vegetarian diet, I decided to make cheese haliva this time. I made my own milk cheese.

I might sound intimidating to make home made cheese, but I can assure you it is not scary at all! All you need is a gallon of milk, a cup of white distilled vinegar, and some seasoning, if you desire.

This is what you do: bring a gallon of milk to a boil in a large stockpot. Stir constantly to prevent scorching. When milk starts to foam, turn off heat and add vinegar. Let it curd for 8 to 10 minutes, add seasoning—I used 1 teaspoon of ground savory and 1 teaspoon of salt. Line a colander with cheesecloth and pour the cheese through. You can collect the whey to use it in other dough recipes or to drink—it is quite thirst quenching—by putting a large bowl under the colander. Let the whey cool and then transfer it to a jar with lid and refrigerate. What is left in colander is your homemade cheese for haliva. Set it aside as you prepare your dough.

To assemble halivas, put one tablespoon of cheese on the disk, brush the edges with water using your finger or pastry brush, turn it and pinch sides with fork. I make large pinches because I like the crunchy edge. You can also use the dough wheel but I do not have one so fork works for me.

In a large skillet, heat ½ cup of vegetable oil—any light frying oil that does not burn, I used corn oil—and fry 3-4 haliva at a time. 2 minutes on each side. Do not let it brown; the color should be gold or orange.
Transfer the pockets onto a platter lined with paper towel to soak up the excess oil. Serve with hot tea, yogurt drink, or that whey that you have collected while making cheese.

Enjoy!

{Note} If you don't like cheese you can substitute it with mashed potatoes. I know I will have to make potato version, too, just for Maya—my meat and potatoes girl!

March 14, 2011

DIY Chicken Nuggets—for real!

Slowly but surely the snow continues to melt around here, revealing last year's mush of fallen leaves and un-trimmed grass. With the cheerful accompaniment of birds' chirping I'm happy to see my backyard covered with mud rather than snow and ice. The meltdown continues.

This time I'm melting down the all time, all kids' (as far as I know) favorite—chicken nuggets. Many of us, parents, already know how unhealthy pre-cooked frozen version could be so I won't go into details. First time I cooked home made nuggets was a while ago. I repeated the attempt few more times but it digressed. Because of one problem—my home made nuggets would never come out good enough for kids to make a switch. Why, oh why?!

One day, I was watching Jamie Oliver's Food Revolution, the very fist episode of his reality show in US and I realized what I was doing wrong. And it was revolutionary, indeed! However, very simple.

Fist of all, I was making them from the whole piece of chicken breast thus creating an unfamiliar texture. Kids could be very sensitive to the texture issue, you know! Second, I was baking them in the oven, thus making the outside not so crispy—another criteria that has not passed my chicken nuggets experts' judgement.

I saw Jamie pulverized chicken carcass in a food processor and then shape the nuggets/patties and then frying them in a little bit of oil—how easy is that! Plus this technique reminded me of the familiar one we use to make "Kotlets" (meat patties) out of minced/ground beef back in Russia.

So I tried the new way to make real nuggets. But instead of chicken carcass that was used in Jamie's experiment as a repellent, I used the expensive cut—chicken breast. And it worked! Passed kids approval on the spot with "so crispy", "so juicy" and "tasted just like the real ones" feedback. Clearly, the term 'real' is used very loosely here!

Here's what I did…

◊◊◊
DIY Real Chicken Nuggets
{Note 1: This recipe yields 16 pieces and I fried them in a small(er) non-stick skillet, 8 at a time. For this reason I needed to add fresh oil to the pan for the second batch. But if you have bigger frying pan, you can fry them all at once and don't need to add more oil. I used olive oil (not the extra virgin) but any vegetable light oil of your choice will do}

1 1/4 lb boneless chicken breast (about 2 breasts) extra fat trimmed
1/2 teaspoon garlic powder
1/2 teaspoon ground savory
(or any other dry herb of your choice)
1 teaspoon onion powder
1 teaspoon salt
1 teaspoon freshly ground black pepper
1/4 cup all purpose flour

2 eggs, beaten

1/2 cup Panko bread crumbs
(if you can't find it, make it yourself—see note below)
1/2 teaspoon dry savory
(or any other dry herb of your choice)
1/2 teaspoon paprika—optional, but gives a nice color

1/4 cup olive oil (+a little more if you're frying in batches)
  1. Prep chicken: Wash and pat it dry. Cut into chunks and put it in the food processor (blender) with spices: salt, pepper, savory, onion and garlic powder. Pulse two times, set aside.
  2. Prep crumbs: add savory and paprika to the bread crumbs and mix well with fork.
    {Note 2: If you can't buy Panko bread crumbs, make it by drying 2-3 white bread slices with crust cut off in 325°F oven for 10-15 minutes until the bread is dry but not toasted. Cool a little and crumb with your hands or in a food processor}
  3. Shape the balls: measure the chicken with the cookie scoop (or tablespoon) then roll in flour and shape balls; set aside.
  4. Assemble the nuggets: make a breading "station": eggs in one bowl, crumbs mix in the other. Dip a nugget ball into eggs then roll it in the crumbs, one at a time. Press with thumb to flatten the ball. After all nuggets are shaped, pop them in the fridge while you heat oil in the pan.
  5. Fry nuggets on medium-hight to high (on my electric cook top's dial it is set to 8, so it's not all the way high but close to it), 5 minutes on one side. Flip and fry 5 more minutes. Place them on a dish towel as you take them from the pan so the excess oil is absorbed.
  6. Serve with your favorite condiment—my kids gobbled them up with ketchup—and some vegetables on the side. Plain 'ol me likes it with plain 'ol sour cream :)
My little critics happily reported that I will never have to by the 'real' chicken nuggets again. For real?!

March 08, 2011

Cinnamon Bagel Chips

In my big family we have so many opinions and we hardly agree on anything. Bagels, however, serve us a common ground—a soft and doughy common ground. They are my little life savers especially on busy mornings when everyone decides they want something different for breakfast! The code word: Bagels!
Inevitably we have left overs. My sophisticated eaters don't like to eat the same everyday (I totally differ!). Although I strongly encourage them not to be picky, sometimes I just have to choose my battles. And leftover bread—that's what bagel is after all—is never waisted. I make bread puddings, crumbs and, of course, croutons or chips.
So that's what I did to two leftover Blueberry bagels. I made chips. Very easy and very cozy for a family game night, for example.
◊◊◊
Cinnamon Blueberry Bagel Chips
2 Bagels, sliced across
1 TB spoon olive oil
1 generous teaspoon cinnamon sugar
(which I make myself mixing sugar and ground cinnamon)

Preheat oven to 350°F
Cut bagels across into 1/4˝ thick slices
In a bowl, mix bagels, cinnamon sugar and oil, toss to cover all the pieces
Arrange the chips on a cookie sheet in a single layer
Bake for 15 minutes or until golden brown
Enjoy with some whipped cream cheese as a dip or on their own! And watch them—new family favorite—disappear…