If I inspired you, I've done my job!
Showing posts with label sides. Show all posts

March 02, 2012

Buck—perhaps, Wheat—not really


Gluten-free cereal. Sounds like an oxymoron… One might argue that there is no such thing. One who doesn’t know about buckwheat…

The fact that buckwheat is gluten-free is news to me. However, buckwheat and I go way back, to gestation trimester number 3: my mom recalls craving buckwheat and eating tons of it when she was pregnant with me. You can say I was «cooked» on it.

This strong tasting cereal is quite popular in Russia. Eat it in the morning with some cold milk or as a side dish, use it to stuff cabbage leaves (however, I would not recommend: no gluten=no sicking…) or make pilafs or salads. Here in USA the tiny pyramid shaped seed is not so popular and mostly known as «Kasha»—the roasted variety (Russian «kasha» means «porridge» or «cereal») or used milled into flour. I’m about to change that (I hope)!

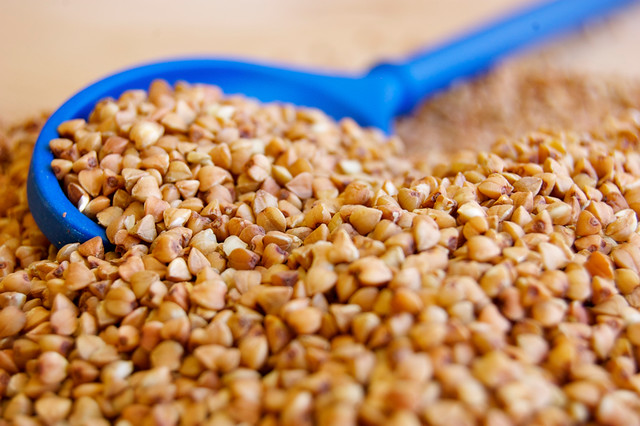
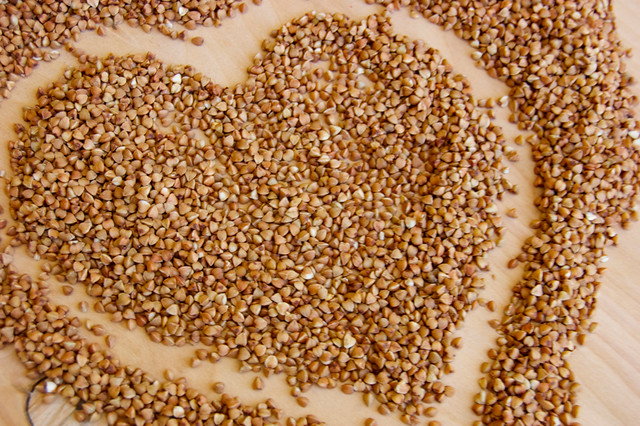
What is this mysterious gluten-free cereal? The word «buckwheat» comes from the Anglo-Saxon words «boc» (beech) and «whoet» (wheat) because the seed resembles a small beechnut and is the same size as a wheat kernel. A clever name to trick an inscient gourmand.

Another interesting fact I learned latterly is that despite its grainy name the plant is actually a fruit and the grain is but a seed. So «gluten free cereal» is not an oxymoron after all! I still can’t wrap my brain around this discovery, but it doesn’t make me like my kasha less.

I always knew, although not from my own experience (yet), that buckwheat is very easy to grow. And that makes me wonder why isn’t it popular! Another property that should make this robust tasting ingredient famous in busy households is that it is very easy—and fast in preparation.

The benefits of buckwheat include but not limited to plant based protein and a substantial amount of fiber. That along should make buckwheat a star in every day vegetarian cooking! In addition, it contains all essential amino acids and B vitamins. Including buckwheat to your diet can help you manage high blood pressure and sugar levels if this is an area of improvement for you… To sum up—it is perfect all around (do I sound overly partial?)


But enough of the scientific talk. What you really need to know is where to find it. Buckwheat is sold in special Russian stores as well as in your supermarket most likely placed in an international or ethnic food isle. I find it with Jewish/Kosher foods.

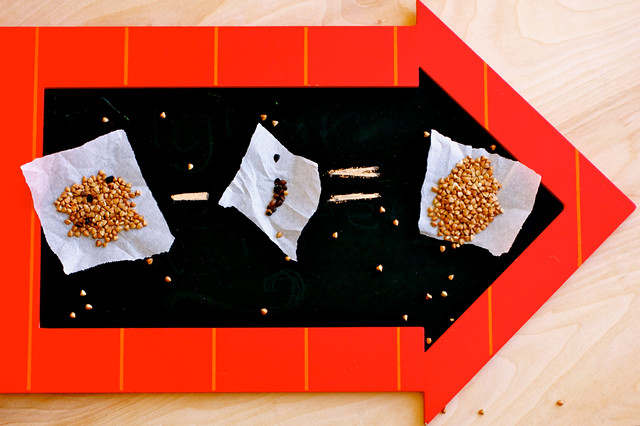
Before you cook buckwheat you might want to pick little black seeds out. There might not be much, but they do ruin presentation (and crackle on your teeth)
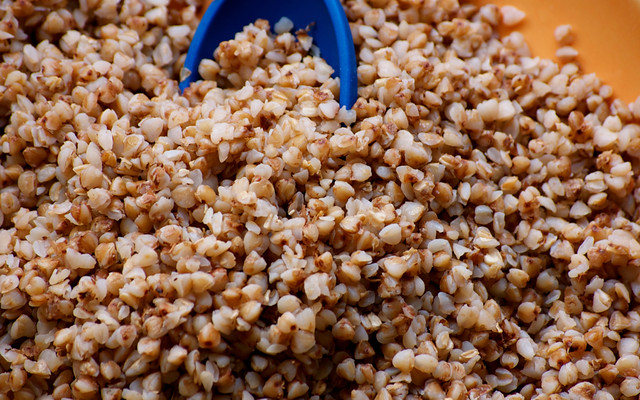
Now take one measure of dry buckwheat and two measures of water. If you want, you can toast it before, but most likely it is sold toasted. Now put the buckwheat and water in a sauce pan, bring to boil, add a pinch of salt and let simmer on a medium heat for 20 minutes or until all the water evaporates.

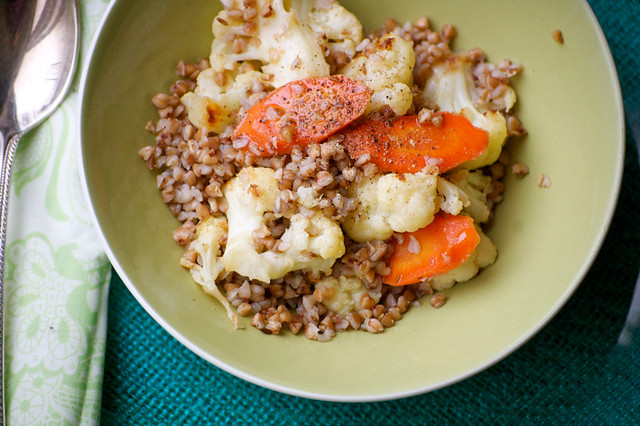
You can cool and store cooked buckwheat for couple of days in a fridge. I used it for this warm salad.

◊◊◊
Buckwheat and Roasted Cauliflower Warm Salad
Serves 4 to 6
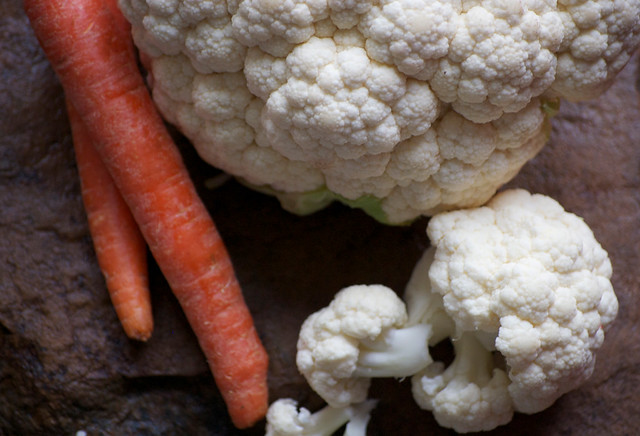
1 medium cauliflower, cut to florets
2 medium carrots, peeled and sliced on bias about 1/8˝ thick
1/2 t spoon cumin seeds
1/2 t spoon coarse sea salt +a dash
2 T spoons olive oil +1 T spoon
1 cup dried buckwheat
2 cups water
Freshly ground black pepper to taste

  • Preheat oven to 400° F
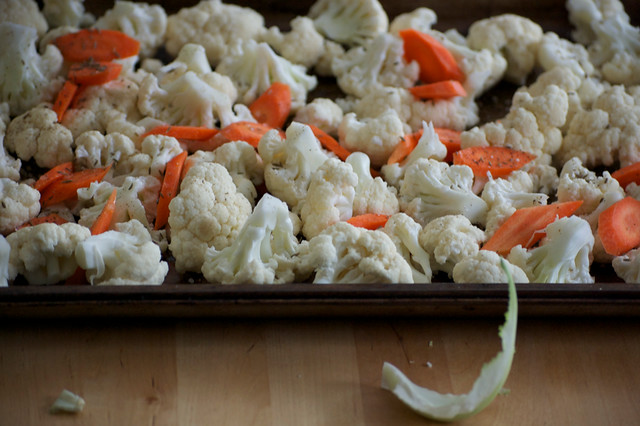
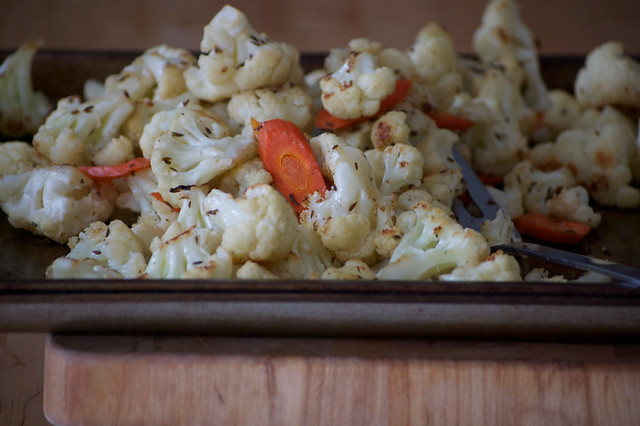
  • On a cookie sheet, arrange cauliflower florets and carrots, sprinkle with cumin seeds, salt and olive oil, toss and roast for 20–25 minutes
  • While cauliflower is in the oven, in a saucepan combine buckwheat and water, bring to boil, add salt, cover and cook on medium heat until all the water is evaporated for 20 minutes
  • When all is cooked, combine vegetables and buckwheat together, drizzle with olive oil and sprinkle with black pepper. Enjoy while it's warm!

Go on, give buckwheat a try, you will be gluten-free you did!
January 14, 2012

They call it Burgul or Bulghur or even Bulgar—I call awesomely wholesome!


There’s a trending topic on foodie twitter scene—to eat one new food each week. I like it! And from what I see, many adventurous and not so eaters and cooks decided to try a new vegetable each week. And it’s fine. But being a “grain girls” as my culinary student cousin called me, I want to introduce to my readers, and by instance to myself, a new grain each week…

I guess I already have one post on the subject this year. My last week can be counted in for lentils, although being legumes, are closely related to grains.

Why grains? Not only because I want to differ from anyone, but also because I like to encourage myself and, if I’m lucky, my entire family, to eat as much seasonal as possible. And this time of the year, although you still might find many vegetables in the supermarket, is the season of the grain!

Furthermore, adding whole grains to your diet is a good way to get health-boosting nutrition, vitamins and minerals without splitting your budget.
Also, I have already shared some recipes with whole grains in my previous posts about Barley and Millet and today I’m introducing Bulgur.

What is this strangely named grain? Despite its scary sounding name and rather long list of spelling variations—bulghur, burghul or bulgar—it is gentle parboiled wheat, cracked into three different varieties: fine, medium or coarse. Fine and medium can be used for stuffing grape leaves or vegetables, and my favorite—coarse bulgur—can be cooked into a wholesome pilaf. Bulgur is vastly used in Turkish and Middle Eastern cuisine—you most likely tried it in a salad, called Tabouleh and is considered a Whole Grain on this side of the pond.

It is also known as an ancient "instant" cereal. Because it's parboiled—that makes it partially cooked, the preparation time is half of its lookalike—cracked wheat. So, next time you want to switch up that rice-o-roni side dish routine, or swap your morning cereal, consider Bulgur for its awesome wholesome nutty taste, chewy texture and easy cooking.

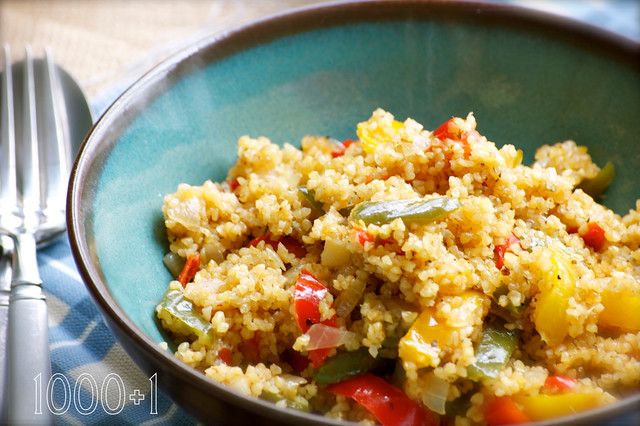
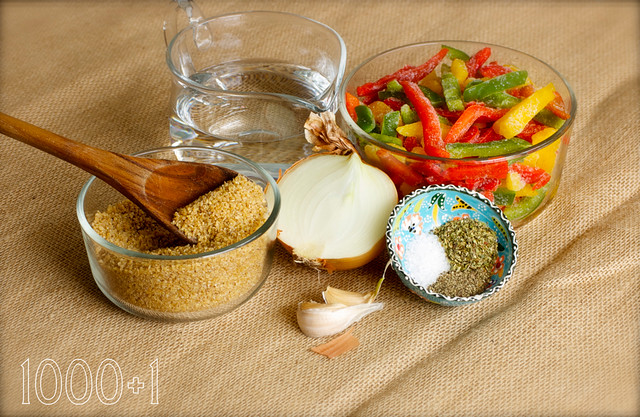
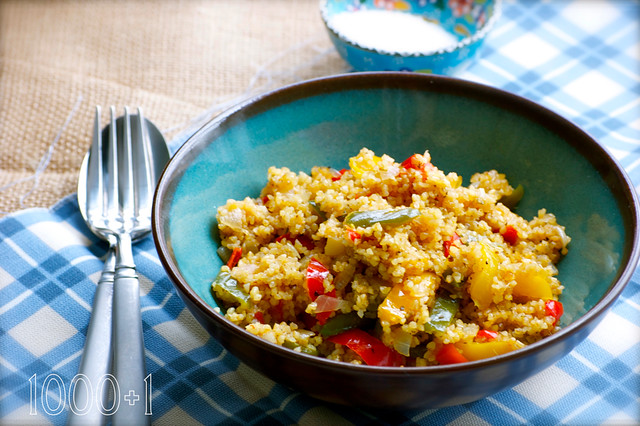
I’m sharing a side dish made with frozen mixed bell peppers that is very easy and fast to prepare. The peppers add color and sweet flavor to this dish making it a perfect companion for almost any protein on your plate. I used dried oregano this time, but you can add any dried herbs of your choice. You can even garnish it with some fresh herbs. If you would like to use fresh peppers, please add an extra ½ cup of liquid to the recipe…

◊◊◊
Bulgur and Mixed Peppers Pilaf
Serves 4


1 T spoon olive oil


1/2 large onion, diced
2 garlic gloves, crushed
1 pk (14 oz) frozen bell peppers, do not thaw
1 t spoon salt
1 t spoon ground black pepper
1 t spoon dry oregano
1 cup bulgur
1 cup water/stock
  • In a saucepan, heat oil over medium heat. Add onions and then garlic and cook for couple of minutes until onions are tender
  • Add frozen bell peppers, season with salt, pepper and oregano and let simmer over medium heat until peppers are thawed, 2 to 3 minutes
  • Add bulgur, toss it with the vegetables, pour water/stock and bring to boil over high heat
  • Lower the heat to medium, cover the pan and let simmer until all liquid is absorbed. Turn off the heat but leave the pilaf on the stove, covered for another 3 to 5 minutes
  • Fluff with fork, serve and enjoy!

May 02, 2011

HERBivores unite!

It is May! And may I say it is the best time to plant a garden outside. If you have limited time and do not wish to fuss with vegetables, plant herbs.

With each bite you will appreciate every little leaf or sprig of fresh herb for they take your cooking to a next level. They are not only an olfactory fantasy but a treat for your taste buds. Easy to grow, most of them are perennials, but when not, you can harvest the seeds for the next gardening year, or to use as spices.

You can use herbs in jillion of recipes, savory and sweet alike. Needless to say that eating fresh herbs will benefit you in many ways: boost your immune system, can cure ailments and conditions, and simply enrich your overall health.

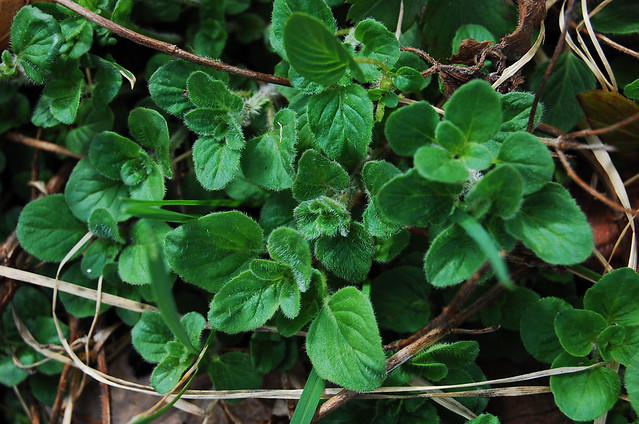
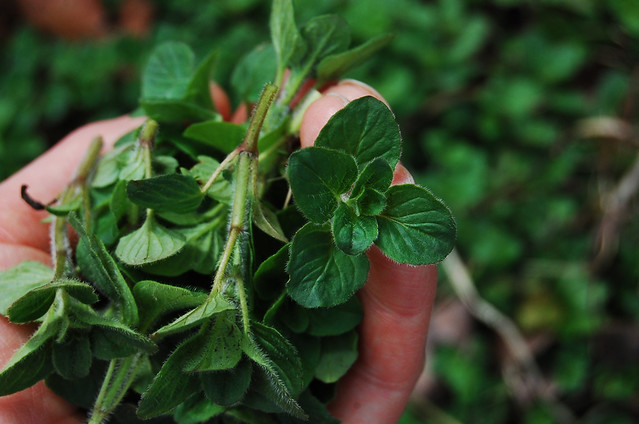
Today in my garden and on my plate is oregano—the bright star of Mediterranean and Spanish cuisines. We are quite familiar with a pungent woody taste of its dried version in pizza and spaghetti sauces. But while using dry oregano during winter I surely enjoy it fresh from the garden all spring and summer long.

Growing wild in the mountains of Greece, oregano can root deeply almost anywhere as long as its leaves get plenty of sunshine. Dormant during the cold season, it is the first one to wake up in my garden. It is filled with goodness (from the web): {the leaves and flowering stems are strongly antiseptic, antispasmodic, diaphoretic, expectorant—I make tea by steeping 1 T spoon of dry oregano in 8 oz of boiling water for 3 minutes to soothe coughs—stimulant and mildly tonic}

I stumbled upon this lovely legend about oregano and I'd like to share it:
{A young servant to Cinyras, the king of Cyprus, was carrying a large vessel full of valuable perfume oils which the king was very fond of. He dropped the container by accident, spilling its content. The servant boy was so afraid of what his punishment would be that he fainted, and while lying unconscious on the ground where the oil had spilled, he turned into the oregano plant.}

I grow two kinds of oregano: Greek, with hairy, thicker leaves and Spanish, with smoother, thinner leaves. However, over the years of growing side by side the two mixed up and now it's hard to tell which is which. So I use them both together.

When using oregano, strip the leaves to chop and add to your savory dish. You can compost the stems, or use them to cook pasta and rice—just add the stems to water where you cook your favorite carbs, or use them when making a soup stock.

Oregano is at home with vegetable dishes as well as meat, poultry and fish, and dairy! Just don't overdo—then it turns bitter.

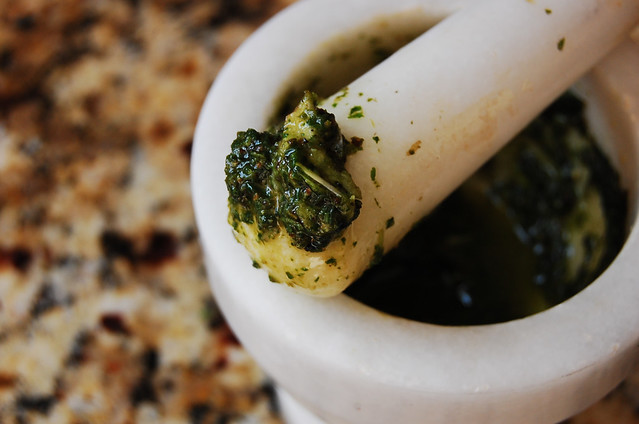
I'm sharing a simple marinade made with fresh oregano and complimenting it garlic. Use this marinade for grilled chicken, shrimp or even as salad dressing. You would need mortar and pestle to crush the fresh ingredients to release their essential oils. I love using this gadget, it feels so primal!

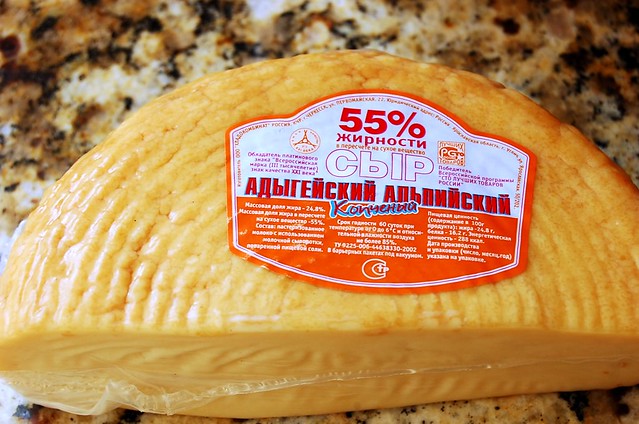
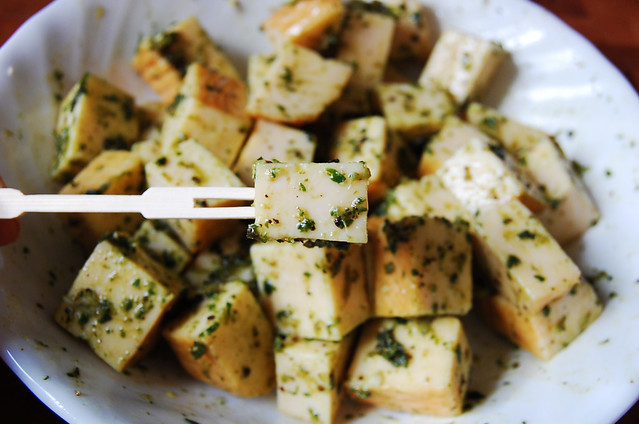
My brother came from Russia and brought a special treat from our region—smoked mata kway (milk cheese). So I used my oregano marinade to make this cheese snack. You can use any smoked soft cheese, such as smoked gouda.
The smoky flavor of cheese, the deep fresh flavor of oregano and the piquant kick of garlic flavor really sing in unison for this simple dish.
◊◊◊
Oregano Marinated Smoked Cheese
Handful fresh oregano (leaves and stems)=1 cup, washed and dried
1 glove of garlic, peeled
1 t spoon coarse sea salt
1 t spoon black peppercorns
1 small dried chili
1/4 cup extra virgin olive oil

16 oz smoked soft cheese
  • Combine oregano, garlic, salt, peppercorns and chili in a mortar and press with pestle until all the oils are released and it is all well mushed.
  • Transfer to a small mixing bowl and all the oil, whisk it together to combine.
  • Cut cheese into 1˝ cubes, pour marinade over and toss to cover completely.
  • Serve as a snack or a side dish.
Grow your herbs, eat your herbs, be a HERBivore! (stay tuned for more herbilicilous ideas)

March 30, 2011

Haliva—Circassian Pierogies

Strolling through the frozen isle in my supermarket, looking for ideas for my last Meltdown for March, hoping that the weather will melt down soon, too I came across pierogies. Right next to Polish pockets full of yummy I saw Chinese dim sum and egg rolls, Italian ravioli and even Turkish borek. Then I spotted Mexican empanadas, looking so sad with a frown next to frozen empanada dough disks. It dawned on me that there is variant unleavened dough wrapped around stuffing creations, fried or boiled, in almost any cuisine. I remembered our own—haliva. Whether fried or boiled—psi haliva, or with different stuffing—cheese, potatoes, meat—they are always a special treat!
I have heard that nowadays many cooks use frozen dough to make these hot pockets (oh, boy! now the jingle from the commercial ad for “Hot Pockets” is stuck in my head) and I agree that it is quite convenient. So why not make your own and freeze them?

Unleavened dough is very easy to make. All you need is water, egg, pinch of salt and flour. To be exact:
1 cup of warm water (102° F)
1 teaspoon salt
1 large egg
3 ½ + cups all purpose flour (you can use white or whole wheat)
  1. Put salt in the water, add egg and mix it all until well combined;
  2. On a clean dry surface pile up the flour, make a well and slowly pour water+egg mixture with one hand, starting the dough with the other;
  3. Knead the dough until semi-soft and smooth, cover and let rest for about half an hour for gluten to set.
Roll the dough in batches to 1/8˝ thick and cut out circles 5 ½˝ in diameter—I used a top of a small sauce pan.
This recipe yields about 50 disks 5 ½˝ in diameter. You can make these shapes smaller or bigger, depending on how you are going to use them. We like bigger size for fried halivas. Layer parchment paper in-between the disks or flour them generously and freeze them up to one month in a zip lock bag, 10 per each package. When needed, thaw the disks at room temperature for about one hour in the bag.

Unleavened dough is very versatile. You can stuff it and fry, boil or bake. You can make ravioli, tortellini, pierories, pelmenis, empanadas, dim sum, egg rolls, manti, borek, haliva and you can even layer it to make a lasagne dish! Not to mention it makes yummy unleavened bread.

Since this time of the year for unleavened breads and vegetarian diet, I decided to make cheese haliva this time. I made my own milk cheese.

I might sound intimidating to make home made cheese, but I can assure you it is not scary at all! All you need is a gallon of milk, a cup of white distilled vinegar, and some seasoning, if you desire.

This is what you do: bring a gallon of milk to a boil in a large stockpot. Stir constantly to prevent scorching. When milk starts to foam, turn off heat and add vinegar. Let it curd for 8 to 10 minutes, add seasoning—I used 1 teaspoon of ground savory and 1 teaspoon of salt. Line a colander with cheesecloth and pour the cheese through. You can collect the whey to use it in other dough recipes or to drink—it is quite thirst quenching—by putting a large bowl under the colander. Let the whey cool and then transfer it to a jar with lid and refrigerate. What is left in colander is your homemade cheese for haliva. Set it aside as you prepare your dough.

To assemble halivas, put one tablespoon of cheese on the disk, brush the edges with water using your finger or pastry brush, turn it and pinch sides with fork. I make large pinches because I like the crunchy edge. You can also use the dough wheel but I do not have one so fork works for me.

In a large skillet, heat ½ cup of vegetable oil—any light frying oil that does not burn, I used corn oil—and fry 3-4 haliva at a time. 2 minutes on each side. Do not let it brown; the color should be gold or orange.
Transfer the pockets onto a platter lined with paper towel to soak up the excess oil. Serve with hot tea, yogurt drink, or that whey that you have collected while making cheese.

Enjoy!

{Note} If you don't like cheese you can substitute it with mashed potatoes. I know I will have to make potato version, too, just for Maya—my meat and potatoes girl!

March 16, 2011

Bean There, Done What?

Today I will deviate from my Big Meltdown mini series to continue with another one I started this January. Back than I highlighted barley as an ingredient/product of the month and then in February beets stepped up into the spot light. March is already half way through and I better pick an ingredient! So I decided to muse upon beans. Looks like I'm going in almost alphabetical order, but trust me, it's not intentional.

My relationship with beans begun rather slowly. As a child, the only kind of beans I ever knew were red kidney beans. We ate beans rather scarcely for no particular reason. Sometimes sautéed with onions, sometimes in salads, where it would be a second or even third ingredient, and almost never as a separate side or main dish.

If I only knew then what I know about beans now.

Over the years since I turned my interest to nutritional values of different food I have been amazed with beans and their potential. First of all it is packed with protein—plant protein—which is a catalyst of our metabolic process. Secondly, unlike other protein rich food beans contain no fat calories and are low in sodium, naturally.
Three basic nutritional staples are tightly packed in each little seed: protein, complex carbohydrates and fiber. In addition, beans contain important vitamins and minerals such as folate, vitamin B1, potassium, calcium, iron among others.
These multitaskers can do so much for you. While health benefits may vary from one kind to another, they have some commonality. Following regiment rich in beans may prevent such conditions as high blood pressure due to potassium content, type 2 diabetes, obesity because fiber in beans helps curb your appetite, high LDL cholesterol levels and even some cancers due to antioxidants that are in some varieties such as black beans.
There isn't a cuisine in the world that doesn't have a dish or two with beans. Growing well in many areas of the world, beans have also been cultivated by humans for ages. Found wild in nature fist, they appeal to human taste buds, I'm guessing, right away.

In my case, however, it wasn't love at first bite. I mean I used to eat beans in salads and mixed in with something else, but not dishes where beans are star ingredient. After learning more about this wonderful nature's diet pill, I ventured to add more beans to my regimen. So I started buying canned beans.
I understand, that the fact that they are canned may not significantly lower their potential and using canned beans can cut prep time tremendously, it is only when I started to cook with dry beans I really liked them. Perhaps for me it was the 'texture' issue, but I still believe it's worth the effort to cook with dry beans rather then canned.
Now, I can honestly declare beans one of my top favorite ingredients. With so many varieties that are different in color, shape, size, texture and taste anyone can find his favorite little seed. I haven't come across a bean I didn't like, yet!

To profess my love to beans further, I started to grow them in my garden collecting a plentiful harvest from late June to early September for three years now. First green beans, then some dry ones, too. I'm looking forward to this year's gardening season!

When cooking with dry beans you need to soak them previously. There are two basic ways to do so: 1) overnight in cold water; 2) for at least 2 hours in boiling water. I must confess, I never soaked beans in boiling water and can't tell you how it works. I use overnight soaking method: empty out 16 oz package of dry beans in a pot big enough to fit about 2 QT of cold water to cover beans; leave overnight. Now before you ready to cook the beans, there's one important step you must undertake: drain and rinse the beans well. The element that makes eating beans a gastrointestinal revolution is now in the water that they have been soaking in. That's why you need to drain, rinse well and cook them in fresh water, thus reducing the impact of that revolution.
Cook beans in slightly salted water until they are soft all the way through: break a single bean and make sure the inside is all translucent. Depending on the kind of bean it could take from 30 to 50 minutes. Undercooked beans contain toxic element {I googled for its name and here it is: Phytohaemagglutinin. I dare you read it out loud!} and can give us moderate or even severe discomfort. Try not to overcook them, either. However, if you do, don't get upset—you can always mush them into a tasty side dish.
And last, but not least bean benefit is that they are dirt cheap! Just scratch the dirt part!

March is almost over and fresh seasonal produce is still scarce around here. But we need vitamins, so adding beans to your diet would be a great option.

Today I'm sharing a simple salad yet again. I made it with cooked lima beans, mild peperoncini peppers, red onions and some herbs. It is so easy so I'm not even going to post a formal recipe.

◊◊◊
Warm+Light Lima Bean Salad
Soak beans+cook them+mix them with some chopped peppers, onions and herbs+add salt'n'pepper+dress with extra virgin olive oil and viola!
{Note: you don't have to cool beans down, just toss it in with the rest of the ingredients and enjoy!}

You can do so much with beans: salads, soups, main dishes and even deserts! Stay tuned for more delicious ways to enjoy these nature's diet pills as I'll be cooking with them very often. You might call me a crazy bean lady! Minus the "crazy" :)

February 15, 2011

Got Adjika?

Valentine's day is over. Chocolate is eaten, obligations are paid. Now back to normal life :)

Today, I'm sharing this simple salad I came up with by combining small red beans, onions and Adjika. Adjika is a national condiment of Abkhazia, a beautiful, now independent country stretched on the Northeast coast of Black Sea.

Many people know of Adjika as a tomato-pepper-herb paste. It could be hot, medium or mild. Actually, real adjika does not require many ingredients, but red chili peppers, herbs- cilantro, parsley, dill (if you find taragon it would give it a nice flavor, but my supermarket didn't have it)- and garlic. Now that it's winter and fresh red chili is not available in this neck of the wood, I used soaked dried chili. I usually dry them myself, but they could be found in Spanish/Mexican section of your supermarket. You can adjust the heat by removing or keeping seeds in the pepper.

Adjika goes good with almost everything, especially meat dishes. But since many of you probably had a heavy feast on Valentine's, I decided to make something light and healthy--small red beans salad.

◊◊◊
Red Beans and Onion salad with homemade Adjika

For Adjika:
a handful (about a cup) of dried red chili peppers, soaked in boiling water for at least 1 hour
a handful (about a cup) of mixed fresh herbs: cilantro, parsley, dill
3-4 gloves of garlic
1/4 cup olive oil
3 TB spoons red wine vinegar
pink of sea salt

For the salad:
8 oz small read beans (or kidney beans), cooked
1/2 medium red onion, sliced
salt to taste

  1. Cook beans: if you can soak them overnight in quadruple amount of water, if you forgot to do that, bring beans and water to boil, take off the heat, cover and let soak for at least 2 hours. After soaking, drain and rinse again.
  2. Cook beans in the same amount of water (at least 1 to 4): bring to boil, add a pinch of salt and cook over medium heat for 1/2 an hour. Don't overcook the beans! In case you don't feel like cooking beans, go ahead, use canned ones, but don't forget to rinse them well. Set aside.
  3. Slice onions, put aside.
  4. To make Adjika, combine all the ingredients in a a food processor or blender, blend until all combined. Transfer Adjika in a glass jar and close with lid. You can keep it in a fridge for couple of month.
  5. Combine cooked beans and onions and dress the salad with 1/2 of the Adjika. If it's not too hot for your taste, add more. Toss and serve over some salad greens if desired or as a side dish.
It might not be your average aphrodisiac but this simple dish will surely give your taste buds a sensual feast!

February 09, 2011

Drunken Redhead

I am not talking about an individual. I'm talking about a red leaf cabbage. I wonder why they called it "red" when, in reality, it is of a gorgeous purple color! Never the less, being a redhead lead this crunchy vegetable to my Red ingredients list for this month.

The red cabbage is a bit more tough comparing to its blonde sister, the leaves are a bit more stiff and more tangy to taste. I wonder if it's the same with redhead/blonde girls? I can't tell—I'm a brunette :)

So to tame this shrew, I decided to make it drunk. I remembered a method to soak the cabbage used by Georgian cooks—not from state of Georgia, but a country in South Caucasus. They use red wine vinegar and boiling water, but add beets to color the white cabbage red. In my case, I already have a rich color hue, so no beets this time. Also, by adding the vinegar, instead of just cooking the cabbage, keeps the color so bright.

To shred the cabbage you can use mandolin, or a very sharp knife—that's what I used since I don't have a slicer (yes, it's on my wish list!).

I decided to brake the cabbage's purpleness and tanginess with sweet green peas. Green just looks so good on purple. And I added sautéed red onions (which could be sliced with mandolin as well)
◊◊◊
Drunken Red Cabbage And Peas Salad

1 medium cabbage (about 2 1/2 lb), shredded
1/2 teaspoon dry cayenne pepper
1 dry red chili pepper
2 TB spoons red wine vinegar
2 quarts boiling water
1 medium red onion, sliced
1 cup frozen peas, thawed
2 TB spoons oil for sautéing onions
Sea salt to taste
  1. Put shredded cabbage in a heat resistant bowl, add cayenne, chili, vinegar and pour boiling water over it. Keep in a warm place for at least 2 hours.

  2. Drain water, preserving couple of TB spoons of water. Divide cabbage in 2. Put one half in a jar, pour preserved water, cover and store in a fridge. It can be used later for more salad.
  3. In a salad bowl combine remaining cabbage and peas. Toss.
  4. In a skillet, heat 2 TB of olive oil, add onions and sauté until they turn translucent. Pour the onions over the cabbage, toss and serve sprinkled with sea salt.
To make this salad is much easier then it seems. I hope this salad will find a special place on your dinner table. Remember, it's made with Redhead!

January 18, 2011

Mashed Cannellini

We crave carbs during winter. What is a better source than straight up starch of potato?! But as much as I respect potatoes, sometimes I need to take it easy on starch.
My daughter once told me that potatoes and beans have the same taste. Although I disagree with her, she's could be right, especially comparing the textures.
So one day, I was cooking beans to make a salad and I over cooked them! Nothing looks nice when overcooked, but it happens. I remembered the comparison my daughter made and decided to just mash them. Canned beans could be heated and used as well (but I'm not a fan of can).
Mashed Cannellini Beans


16 oz (1 package) dry Cannellini beans, soaked overnight, rinsed, drained and overcooked
1 medium onion, finely chopped
2-3 cloves garlic, minced
1 cup plain yogurt
1 Tablespoon butter
2 Tablespoons vegetable/olive oil
2 teaspoon ground cumin
Sea salt }to taste
Ground black pepper }to taste

Soak dry beans overnight then drain and rinse. Put in the pot, cover with about 6-8 cups of water and bring to boil over high heat. When boiled, add salt, lower the heat and cook for 40 to 50 minutes- to overcook: you will notice that the beans are skinned and look mushy.

While beans are cooking, heat oil and melt butter in it; sauté onions and garlic in the oil until onions turn light brown. Add salt, pepper and cumin. Remove from heat, set aside.

With an immersion blender or in a food processor mash beans with yogurt until well combined. Add onions. Serve as a side dish in lieu of mash potatoes.

==================================

Зимой наш организм требует углеводов. И что может быть лучше и привычнее картофельного крахмала?! Но не смотря на то, что я уважаю картошку, иногда мне нужно быть немного по осторожнее с крахмалом.
Моя дочка однажды заметила, что картофель и фасоль имеют одинаковый вкус. Хотя я с ней не совсем согласна, она может быть и права, особенно, если сравнивать их текстуру.
Вот в один прекрасный день, я решила приготовить белую фасоль, чтобы сделать салат, и перестаралась--переварила фасоль! Я вспомнила сравнение, которое делала дочка и решила просто смять фасоль в пюре.
Можно использовать подогретую консервированную фасоль, но лучше сварить, то есть переварить сухую.

Пюре из белой фасоли Каннеллини

1 упаковка (900 гр) сухой белой фасоли, замоченной на ночь, промыть, осушить и переварить
1 мелко нарезанная средняя луковица,
2-3 зубчика чеснока, растолчить
1 чашка обычного йогурта
1 столовая ложка сливочного масла
2 столовые ложки растительного/оливкового масла
2 чайной ложки молотой зиры (римский тмин)
Морская соль по вкусу
Молотый черный перец по вкусу

Замочить фасоль на ночь, затем слить воду и прополоскать. Положить в кастрюлю, залить 6-8 стаканами воды и довести до кипения на сильном огне. При кипячении, добавить соль, уменьшите огонь и варить в течение 40 до 50 минут, чтобы переварить: вы заметите, что у фасоли отделилась кожица и она размякла.

Пока варится фасоль, растопить сливочное масло в подогретом растительном, поджарить
лук и чеснок в масле до золотистого цвета. Добавить соль, перец и тмин. Снять с огня.

Ручным блендером или кухонном комбайне размять в пюре фасоль с йогуртом. Добавить лук в масле. Подавать в качестве гарнира вместо картофельного пюре.