If I inspired you, I've done my job!
Showing posts with label salads. Show all posts

March 02, 2012

Buck—perhaps, Wheat—not really


Gluten-free cereal. Sounds like an oxymoron… One might argue that there is no such thing. One who doesn’t know about buckwheat…
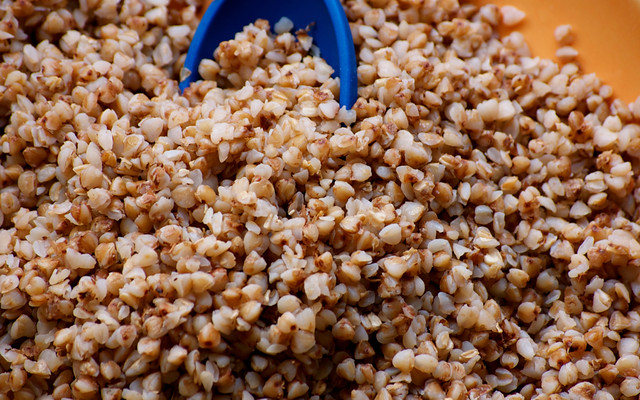
The fact that buckwheat is gluten-free is news to me. However, buckwheat and I go way back, to gestation trimester number 3: my mom recalls craving buckwheat and eating tons of it when she was pregnant with me. You can say I was «cooked» on it.

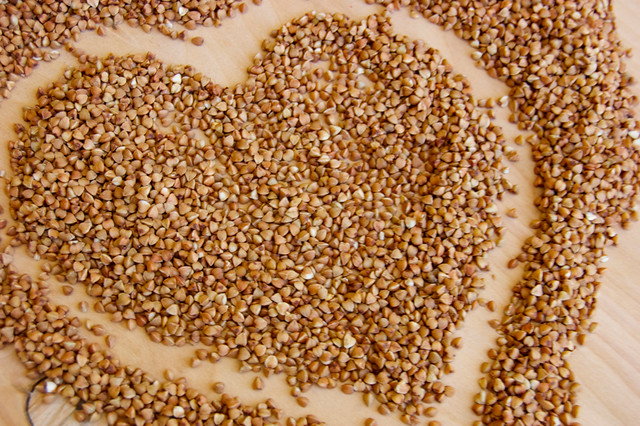
This strong tasting cereal is quite popular in Russia. Eat it in the morning with some cold milk or as a side dish, use it to stuff cabbage leaves (however, I would not recommend: no gluten=no sicking…) or make pilafs or salads. Here in USA the tiny pyramid shaped seed is not so popular and mostly known as «Kasha»—the roasted variety (Russian «kasha» means «porridge» or «cereal») or used milled into flour. I’m about to change that (I hope)!

What is this mysterious gluten-free cereal? The word «buckwheat» comes from the Anglo-Saxon words «boc» (beech) and «whoet» (wheat) because the seed resembles a small beechnut and is the same size as a wheat kernel. A clever name to trick an inscient gourmand.

Another interesting fact I learned latterly is that despite its grainy name the plant is actually a fruit and the grain is but a seed. So «gluten free cereal» is not an oxymoron after all! I still can’t wrap my brain around this discovery, but it doesn’t make me like my kasha less.

I always knew, although not from my own experience (yet), that buckwheat is very easy to grow. And that makes me wonder why isn’t it popular! Another property that should make this robust tasting ingredient famous in busy households is that it is very easy—and fast in preparation.
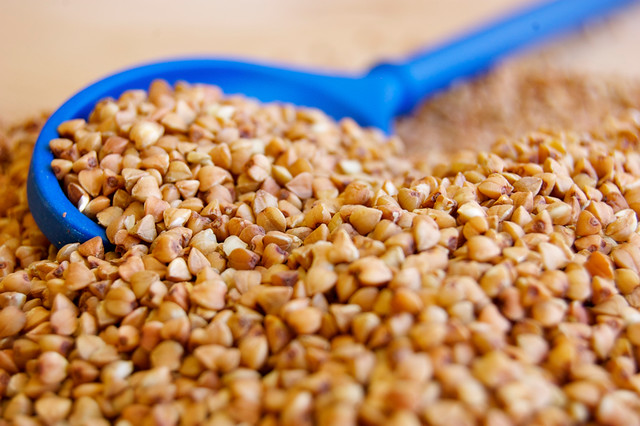
The benefits of buckwheat include but not limited to plant based protein and a substantial amount of fiber. That along should make buckwheat a star in every day vegetarian cooking! In addition, it contains all essential amino acids and B vitamins. Including buckwheat to your diet can help you manage high blood pressure and sugar levels if this is an area of improvement for you… To sum up—it is perfect all around (do I sound overly partial?)


But enough of the scientific talk. What you really need to know is where to find it. Buckwheat is sold in special Russian stores as well as in your supermarket most likely placed in an international or ethnic food isle. I find it with Jewish/Kosher foods.

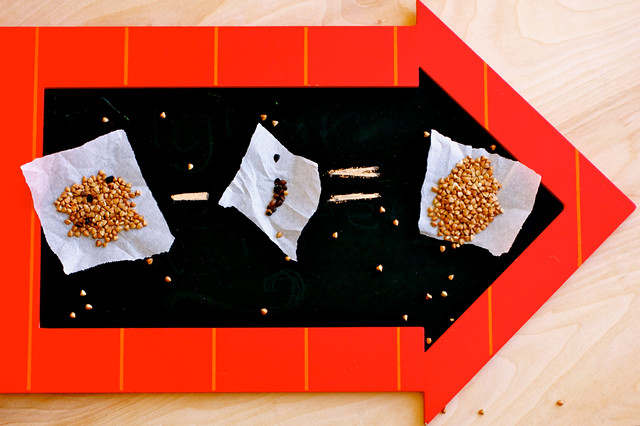
Before you cook buckwheat you might want to pick little black seeds out. There might not be much, but they do ruin presentation (and crackle on your teeth)
Now take one measure of dry buckwheat and two measures of water. If you want, you can toast it before, but most likely it is sold toasted. Now put the buckwheat and water in a sauce pan, bring to boil, add a pinch of salt and let simmer on a medium heat for 20 minutes or until all the water evaporates.

You can cool and store cooked buckwheat for couple of days in a fridge. I used it for this warm salad.

◊◊◊
Buckwheat and Roasted Cauliflower Warm Salad
Serves 4 to 6
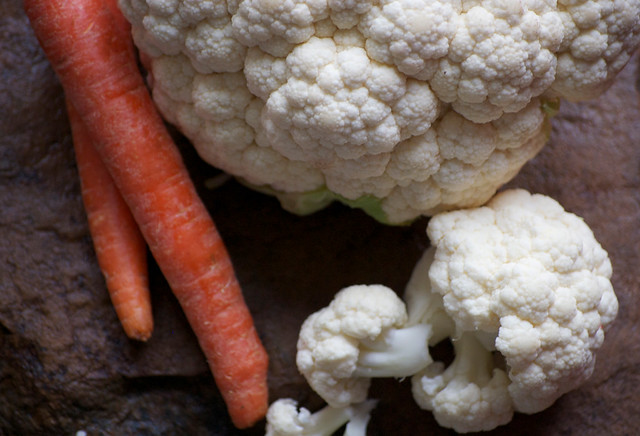
1 medium cauliflower, cut to florets
2 medium carrots, peeled and sliced on bias about 1/8˝ thick
1/2 t spoon cumin seeds
1/2 t spoon coarse sea salt +a dash
2 T spoons olive oil +1 T spoon
1 cup dried buckwheat
2 cups water
Freshly ground black pepper to taste
  • Preheat oven to 400° F
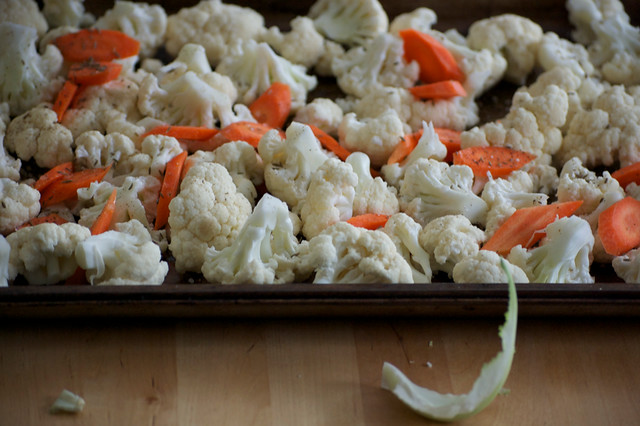
  • On a cookie sheet, arrange cauliflower florets and carrots, sprinkle with cumin seeds, salt and olive oil, toss and roast for 20–25 minutes
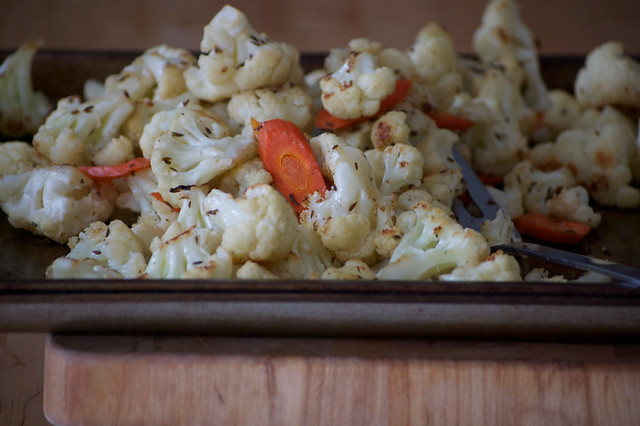
  • While cauliflower is in the oven, in a saucepan combine buckwheat and water, bring to boil, add salt, cover and cook on medium heat until all the water is evaporated for 20 minutes
  • When all is cooked, combine vegetables and buckwheat together, drizzle with olive oil and sprinkle with black pepper. Enjoy while it's warm!
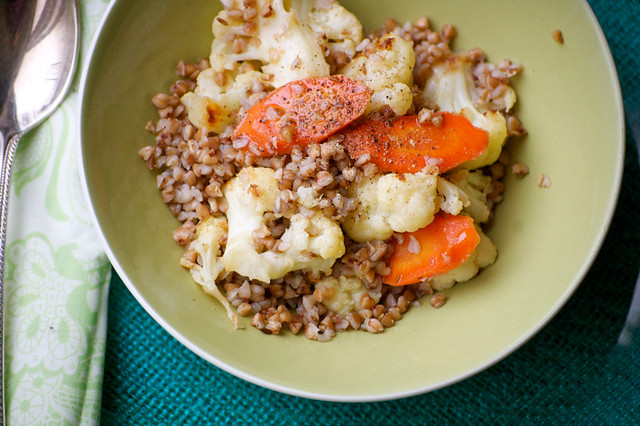
Go on, give buckwheat a try, you will be gluten-free you did!

April 14, 2011

Spotlight on chives—the good guys

Since it’s April, I have decided to select a green ingredient for the ingredient of the month. Asparagus represents this time of year most commonly, but while it is basking in a spotlight of the culinary stage during the month of April, it is not the only opening crop during early gardening season.
I picked early chives. While you might find them on the shelves of your supermarket almost all year round, they are pioneers in my garden along with scallions and garlic.

These invigorating flavors, strong or subtle, along with dill, radishes, and sorrel were always associated with spring and early harvest for me since I was a little kid.

I chose onion's timid little brother not only because I like its mild oniony flavor—it is the smallest member of the onion family—but also because it has many nutritional qualities that are unfairly overlooked. I think it is because chives’ benefits are often compared to garlic’s and onions’ and in this comparison, they are rather faint. Never the less, chives are full of vitamins, enough to make it a main ingredient for a dish.

Alas, because of its size, I assume, it is mostly used as garnish or as an herb.

Chives are high in vitamins A and C, potassium, and calcium. Its sulfur compounds—sulfides and sulfoxides have antibiotic properties. Chives contain essential oil that can be extracted from fresh green leaves and used to cure fungus infection of the skin. Other health benefits, very similar to those of chives big brothers, include ability to lower the blood pressure and this aid circulatory system.

Although these little straws of oniony crunchiness grow wild in both hemispheres, farmers have also cultivated chives for many years. Chives were cultivated in Europe in early XVI century and became one of the staples of French cuisine along with tarragon and chervil. Chives are commonly used in fish and meat dishes or condiments. Most of the time, it is used fresh but you can find it in a freeze-dried form in your supermarket’s herb isle as well.
I have been growing my own chives for few years now in containers on my deck. I read somewhere that the beautiful purple flowers, which burst in a cluster, emanate scent that is pest (insects) repellent at the same time attractive for bees. That is why it is a good idea to plant them in or near your garden.

Add chives to your next soup or salad, baked creation or sauce to give your taste buds a delicate hint of onion flavor and crunchy texture! As much as I would like to come up with a dish that uses chives as a main ingredient, this time I used them as a secondary ingredient in my favorite salad and in Sloppy Joes.

These two dishes are very easy and will be ready in minutes. I have to mention that my joeys get jumpy for Sloppy Joes!

◊◊◊

Chives Turkey Sloppy Joes for Joeys

Makes 8 ¼ lb sandwiches

2 lb ground turkey
1 cup chopped chives
½ cup chopped dill
1 generous T spoon dry chives
1 t spoon sea salt
½ t spoon freshly ground black pepper
1 cup (8 oz) tomato sauce
2 T spoons tomato paste
2 T spoons olive oil
1 T spoon balsamic vinegar (optional, not shown on the photo)

8 whole wheat buns (I used focaccia buns)

  • Heat oil in a sauce pan, add turkey, dry chives, salt and pepper, sauté on high until turkey is no longer pink (about 5-7 minutes) stirring to prevent scorching.
  • Add tomato paste, tomato sauce let it boil then turn the heat down and simmer partially closed for 15 minutes, stirring occasionally.
  • Add vinegar, stir, and then add fresh chives and dill.
  • Serve in a bun filled with about ¼ cup of turkey with some fresh vegetables and/or the following radish salad.

◊◊◊

Chives and Radish Spring Salad

For 4 1-cup servings

2 bunches of fresh radishes, leaves and ends trimmed, quartered
½ cup (2-3 generous T spoons) chopped chives
2 T spoons chopped fresh dill
2 T spoons sour cream
Salt and freshly ground black pepper to taste

  • In a bowl combine all the ingredients and refrigerate for 20 minutes. Serve with Sloppy Joes or as a snack.
For some there is an asparagus to remind the spring is here, for me it is this salad with fine oniony flavor of chives and fresh crunch of the radishes.

March 16, 2011

Bean There, Done What?

Today I will deviate from my Big Meltdown mini series to continue with another one I started this January. Back than I highlighted barley as an ingredient/product of the month and then in February beets stepped up into the spot light. March is already half way through and I better pick an ingredient! So I decided to muse upon beans. Looks like I'm going in almost alphabetical order, but trust me, it's not intentional.

My relationship with beans begun rather slowly. As a child, the only kind of beans I ever knew were red kidney beans. We ate beans rather scarcely for no particular reason. Sometimes sautéed with onions, sometimes in salads, where it would be a second or even third ingredient, and almost never as a separate side or main dish.

If I only knew then what I know about beans now.

Over the years since I turned my interest to nutritional values of different food I have been amazed with beans and their potential. First of all it is packed with protein—plant protein—which is a catalyst of our metabolic process. Secondly, unlike other protein rich food beans contain no fat calories and are low in sodium, naturally.
Three basic nutritional staples are tightly packed in each little seed: protein, complex carbohydrates and fiber. In addition, beans contain important vitamins and minerals such as folate, vitamin B1, potassium, calcium, iron among others.
These multitaskers can do so much for you. While health benefits may vary from one kind to another, they have some commonality. Following regiment rich in beans may prevent such conditions as high blood pressure due to potassium content, type 2 diabetes, obesity because fiber in beans helps curb your appetite, high LDL cholesterol levels and even some cancers due to antioxidants that are in some varieties such as black beans.
There isn't a cuisine in the world that doesn't have a dish or two with beans. Growing well in many areas of the world, beans have also been cultivated by humans for ages. Found wild in nature fist, they appeal to human taste buds, I'm guessing, right away.

In my case, however, it wasn't love at first bite. I mean I used to eat beans in salads and mixed in with something else, but not dishes where beans are star ingredient. After learning more about this wonderful nature's diet pill, I ventured to add more beans to my regimen. So I started buying canned beans.
I understand, that the fact that they are canned may not significantly lower their potential and using canned beans can cut prep time tremendously, it is only when I started to cook with dry beans I really liked them. Perhaps for me it was the 'texture' issue, but I still believe it's worth the effort to cook with dry beans rather then canned.
Now, I can honestly declare beans one of my top favorite ingredients. With so many varieties that are different in color, shape, size, texture and taste anyone can find his favorite little seed. I haven't come across a bean I didn't like, yet!

To profess my love to beans further, I started to grow them in my garden collecting a plentiful harvest from late June to early September for three years now. First green beans, then some dry ones, too. I'm looking forward to this year's gardening season!

When cooking with dry beans you need to soak them previously. There are two basic ways to do so: 1) overnight in cold water; 2) for at least 2 hours in boiling water. I must confess, I never soaked beans in boiling water and can't tell you how it works. I use overnight soaking method: empty out 16 oz package of dry beans in a pot big enough to fit about 2 QT of cold water to cover beans; leave overnight. Now before you ready to cook the beans, there's one important step you must undertake: drain and rinse the beans well. The element that makes eating beans a gastrointestinal revolution is now in the water that they have been soaking in. That's why you need to drain, rinse well and cook them in fresh water, thus reducing the impact of that revolution.
Cook beans in slightly salted water until they are soft all the way through: break a single bean and make sure the inside is all translucent. Depending on the kind of bean it could take from 30 to 50 minutes. Undercooked beans contain toxic element {I googled for its name and here it is: Phytohaemagglutinin. I dare you read it out loud!} and can give us moderate or even severe discomfort. Try not to overcook them, either. However, if you do, don't get upset—you can always mush them into a tasty side dish.
And last, but not least bean benefit is that they are dirt cheap! Just scratch the dirt part!

March is almost over and fresh seasonal produce is still scarce around here. But we need vitamins, so adding beans to your diet would be a great option.

Today I'm sharing a simple salad yet again. I made it with cooked lima beans, mild peperoncini peppers, red onions and some herbs. It is so easy so I'm not even going to post a formal recipe.

◊◊◊
Warm+Light Lima Bean Salad
Soak beans+cook them+mix them with some chopped peppers, onions and herbs+add salt'n'pepper+dress with extra virgin olive oil and viola!
{Note: you don't have to cool beans down, just toss it in with the rest of the ingredients and enjoy!}

You can do so much with beans: salads, soups, main dishes and even deserts! Stay tuned for more delicious ways to enjoy these nature's diet pills as I'll be cooking with them very often. You might call me a crazy bean lady! Minus the "crazy" :)

February 15, 2011

Got Adjika?

Valentine's day is over. Chocolate is eaten, obligations are paid. Now back to normal life :)

Today, I'm sharing this simple salad I came up with by combining small red beans, onions and Adjika. Adjika is a national condiment of Abkhazia, a beautiful, now independent country stretched on the Northeast coast of Black Sea.

Many people know of Adjika as a tomato-pepper-herb paste. It could be hot, medium or mild. Actually, real adjika does not require many ingredients, but red chili peppers, herbs- cilantro, parsley, dill (if you find taragon it would give it a nice flavor, but my supermarket didn't have it)- and garlic. Now that it's winter and fresh red chili is not available in this neck of the wood, I used soaked dried chili. I usually dry them myself, but they could be found in Spanish/Mexican section of your supermarket. You can adjust the heat by removing or keeping seeds in the pepper.

Adjika goes good with almost everything, especially meat dishes. But since many of you probably had a heavy feast on Valentine's, I decided to make something light and healthy--small red beans salad.

◊◊◊
Red Beans and Onion salad with homemade Adjika

For Adjika:
a handful (about a cup) of dried red chili peppers, soaked in boiling water for at least 1 hour
a handful (about a cup) of mixed fresh herbs: cilantro, parsley, dill
3-4 gloves of garlic
1/4 cup olive oil
3 TB spoons red wine vinegar
pink of sea salt

For the salad:
8 oz small read beans (or kidney beans), cooked
1/2 medium red onion, sliced
salt to taste

  1. Cook beans: if you can soak them overnight in quadruple amount of water, if you forgot to do that, bring beans and water to boil, take off the heat, cover and let soak for at least 2 hours. After soaking, drain and rinse again.
  2. Cook beans in the same amount of water (at least 1 to 4): bring to boil, add a pinch of salt and cook over medium heat for 1/2 an hour. Don't overcook the beans! In case you don't feel like cooking beans, go ahead, use canned ones, but don't forget to rinse them well. Set aside.
  3. Slice onions, put aside.
  4. To make Adjika, combine all the ingredients in a a food processor or blender, blend until all combined. Transfer Adjika in a glass jar and close with lid. You can keep it in a fridge for couple of month.
  5. Combine cooked beans and onions and dress the salad with 1/2 of the Adjika. If it's not too hot for your taste, add more. Toss and serve over some salad greens if desired or as a side dish.
It might not be your average aphrodisiac but this simple dish will surely give your taste buds a sensual feast!

February 09, 2011

Drunken Redhead

I am not talking about an individual. I'm talking about a red leaf cabbage. I wonder why they called it "red" when, in reality, it is of a gorgeous purple color! Never the less, being a redhead lead this crunchy vegetable to my Red ingredients list for this month.

The red cabbage is a bit more tough comparing to its blonde sister, the leaves are a bit more stiff and more tangy to taste. I wonder if it's the same with redhead/blonde girls? I can't tell—I'm a brunette :)

So to tame this shrew, I decided to make it drunk. I remembered a method to soak the cabbage used by Georgian cooks—not from state of Georgia, but a country in South Caucasus. They use red wine vinegar and boiling water, but add beets to color the white cabbage red. In my case, I already have a rich color hue, so no beets this time. Also, by adding the vinegar, instead of just cooking the cabbage, keeps the color so bright.

To shred the cabbage you can use mandolin, or a very sharp knife—that's what I used since I don't have a slicer (yes, it's on my wish list!).

I decided to brake the cabbage's purpleness and tanginess with sweet green peas. Green just looks so good on purple. And I added sautéed red onions (which could be sliced with mandolin as well)
◊◊◊
Drunken Red Cabbage And Peas Salad

1 medium cabbage (about 2 1/2 lb), shredded
1/2 teaspoon dry cayenne pepper
1 dry red chili pepper
2 TB spoons red wine vinegar
2 quarts boiling water
1 medium red onion, sliced
1 cup frozen peas, thawed
2 TB spoons oil for sautéing onions
Sea salt to taste
  1. Put shredded cabbage in a heat resistant bowl, add cayenne, chili, vinegar and pour boiling water over it. Keep in a warm place for at least 2 hours.

  2. Drain water, preserving couple of TB spoons of water. Divide cabbage in 2. Put one half in a jar, pour preserved water, cover and store in a fridge. It can be used later for more salad.
  3. In a salad bowl combine remaining cabbage and peas. Toss.
  4. In a skillet, heat 2 TB of olive oil, add onions and sauté until they turn translucent. Pour the onions over the cabbage, toss and serve sprinkled with sea salt.
To make this salad is much easier then it seems. I hope this salad will find a special place on your dinner table. Remember, it's made with Redhead!