May 09, 2011
Checkerboard of days
April 20, 2011
The Bleach Experiment
March 30, 2011
Haliva—Circassian Pierogies

Unleavened dough is very easy to make. All you need is water, egg, pinch of salt and flour. To be exact:
- Put salt in the water, add egg and mix it all until well combined;
- On a clean dry surface pile up the flour, make a well and slowly pour water+egg mixture with one hand, starting the dough with the other;
- Knead the dough until semi-soft and smooth, cover and let rest for about half an hour for gluten to set.


Since this time of the year for unleavened breads and vegetarian diet, I decided to make cheese haliva this time. I made my own milk cheese.
This is what you do: bring a gallon of milk to a boil in a large stockpot. Stir constantly to prevent scorching. When milk starts to foam, turn off heat and add vinegar. Let it curd for 8 to 10 minutes, add seasoning—I used 1 teaspoon of ground savory and 1 teaspoon of salt. Line a colander with cheesecloth and pour the cheese through. You can collect the whey to use it in other dough recipes or to drink—it is quite thirst quenching—by putting a large bowl under the colander. Let the whey cool and then transfer it to a jar with lid and refrigerate. What is left in colander is your homemade cheese for haliva. Set it aside as you prepare your dough.

To assemble halivas, put one tablespoon of cheese on the disk, brush the edges with water using your finger or pastry brush, turn it and pinch sides with fork. I make large pinches because I like the crunchy edge. You can also use the dough wheel but I do not have one so fork works for me.


In a large skillet, heat ½ cup of vegetable oil—any light frying oil that does not burn, I used corn oil—and fry 3-4 haliva at a time. 2 minutes on each side. Do not let it brown; the color should be gold or orange.


Spring Cleaning or Cleaning Out Your Wallet?
When I first bought my swiffer mop, it was a love at first application! What is not to love—it is always ready when you are. This sort of a commitment any mother can appreciate. What else is there standing by ready to be used as soon as need arrives? No fuss, no mess, nothing but squeaky-clean floors!
Few years later, when I had my last child I thought of reconsidering this magic wand. You see, being the youngest out of three siblings my baby son literary grew up on the floor. While I was tending my choirs around the house he would keep himself busy with toys on the floor and thus secure from any falls—you can’t fall lower then the floor. It was the safest place. Or was it?
Ever mobile crawling baby would venture far beyond his place mat and explore the housescape around him. Sometimes he would come across little flecks of food that he would vacuum adamantly, other times he would encounter even smaller specks that he wouldn’t even aware of—the chemicals, which he’d slobber up with an ever curious mouth of his.
Yes, the chemicals that were left by my wonderful loyal helper. I had to stop using the solution at once. I still had some pads left that I was trying to use dry or with a home made all purpose cleaning solution, a mixture of equal parts of vinegar and water and few drops of essential oils. It seemed I had a perfect solution!
However, being a mom I learned to be conscious about my budget. Moping floors with disposable pads seemed as ludicrous as cleaning with dollar bills. Another lesson taught by motherhood is a respect for environment. The three RRR—reuse, reduce, recycle—and my own interpretation—regard, respect, responsibility—had been my mantra for the past 5 years. I could not buy these pads any longer. Plus, for the same reasons I stopped using paper towels, replacing them with cloth rags and microfiber clothe, both machine washable, for dusting and cleaning surfaces.
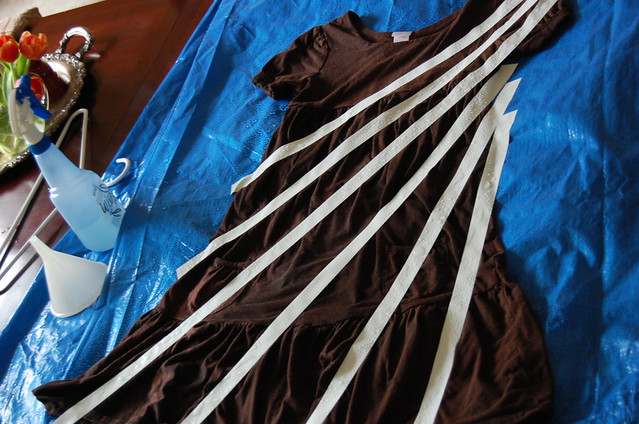
And there I was with a useless carcass of a swiffer mop in a utility closet and messy floors around. There is no substitute for getting down on your knees to clean the floors, not even other mops out there, which scared me tremendously because of anti propaganda of bacteria that it carries, but who's got time to mop this way every day? I had to find something that would be easy to use, ready any time and reusable.
One day, I was shopping on etsy.com and came across these wonderful replacement covers and it clicked!
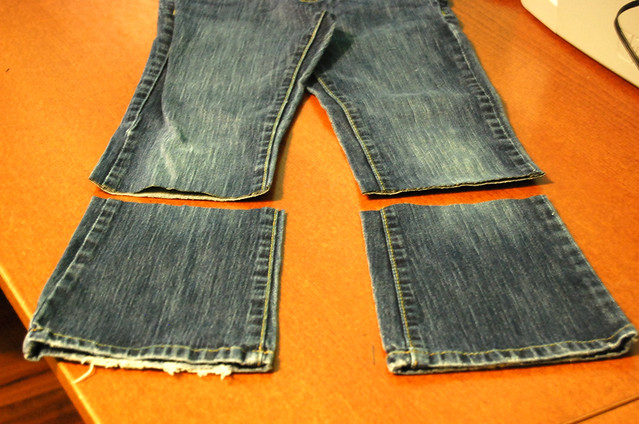
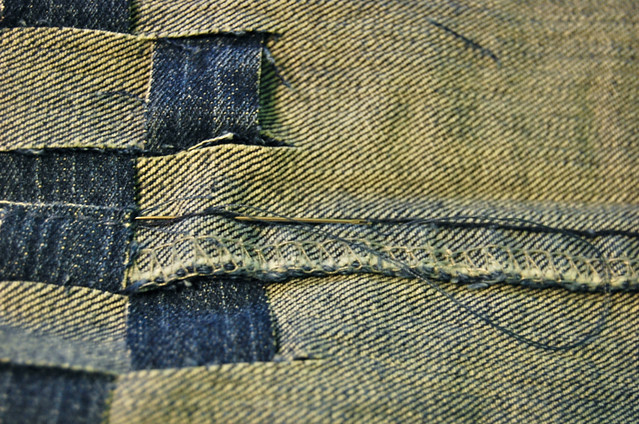
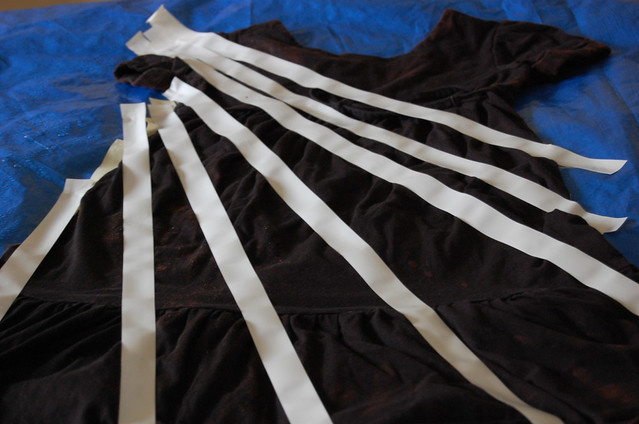
Now I am going to make my own by cutting up old jersey t-shirts into strips and using it as yarn to crochet the cover. You can also use machine washable microfiber cloths; just sew the edges so it can easily slip onto your mop.
As I mentioned earlier, you can make your own all-purpose cleaning solution. Mix equal parts of water and white vinegar, say 1 cup to 1 cup and add 20 drops of your favorite essential oil. I like eucalyptus for its smell but sometimes use lavender. A small bottle lasts pretty long, too.
Easy to make, easy to use, easy for your wallet and easy on the environment!
March 22, 2011
Give your pillow a second chance!


March 14, 2011
DIY Chicken Nuggets—for real!

- Prep chicken: Wash and pat it dry. Cut into chunks and put it in the food processor (blender) with spices: salt, pepper, savory, onion and garlic powder. Pulse two times, set aside.
- Prep crumbs: add savory and paprika to the bread crumbs and mix well with fork. {Note 2: If you can't buy Panko bread crumbs, make it by drying 2-3 white bread slices with crust cut off in 325°F oven for 10-15 minutes until the bread is dry but not toasted. Cool a little and crumb with your hands or in a food processor}
- Shape the balls: measure the chicken with the cookie scoop (or tablespoon) then roll in flour and shape balls; set aside.
Assemble the nuggets: make a breading "station": eggs in one bowl, crumbs mix in the other. Dip a nugget ball into eggs then roll it in the crumbs, one at a time. Press with thumb to flatten the ball. After all nuggets are shaped, pop them in the fridge while you heat oil in the pan.
- Fry nuggets on medium-hight to high (on my electric cook top's dial it is set to 8, so it's not all the way high but close to it), 5 minutes on one side. Flip and fry 5 more minutes. Place them on a dish towel as you take them from the pan so the excess oil is absorbed.
- Serve with your favorite condiment—my kids gobbled them up with ketchup—and some vegetables on the side. Plain 'ol me likes it with plain 'ol sour cream :)
March 09, 2011
Pulp or No Pulp

February 17, 2011
"And a peel for the wolf!"//"А для волка--кожура!"

- Orange peel has high content of essential oil, which is highly flammable. So dried orange peel can be used for starting a fire or kindling for your fireplace;
- I found out on the web, cats don't like orange smell. If you put orange peel next to your house plants, your feline won't chew on it;
- My friend, who is lucky to have a blender inside her kitchen sink, purposely throws and pulverizes the orange peel in it to get rid of bad odors;
- I don't have the pulverizer so I just scrub sink with orange peel;
- For the same purpose--freshness--you can use orange peel to deodorize trash cans by placing the peel on the bottom of the can before lining it with bag. It can also ward off the insects during summer months;
- If you rub oil on your skin, you can prevent mosquito bites during summer as well;
- You can add the orange peel to home made potpourri--it's white pith is super absorbent and will absorb bad odors and humidity from the air;
- Because of it's absorbent qualities, you can also use the peel in closets to soak up musty smell--put it in a cloth bag first; same bag can be used in a car as a air freshener;
- It could be used in cooking, of course. With a microplane zester, peel the top layer of the orange peel--the one that does not have white pith--and use this zest in dessert or savory dishes alike to add a distinct orange flavor;
- You can also use the whole peel to make "succades"--candied orange peel (recipe will follow, start collecting the peel);
- If you're a drinker, you can infuse vodka and other hard liquor with orange peel, too;
- If you're not a drinker--make some tea with dried orange peel by steeping a tablespoon of it in a cup of hot water for 5 minutes.
- Из за высокого содержания в ней эфирного масла, которое легко воспламеняемо, кожуру апельсина можно использовать в качестве разжигателя или в качестве щепок для камина;
- Я узнала из интернета, что кошки не любят запах апельсина. Если положить шкорки около домашних цветков, которые объедает ваша мурка, она к ним больше не подойдёт;
- Моя подруга, которой посчастливилось иметь раковину с блендером, использует апельсиновую кожуру для того, чтобы избавиться от плохого запаха;
- У меня, к сожалению такого приспособления нет, поэтому я натираю кухонную раковину шкорками для запаха;
- Так же для запаха и свежести шкорки можно положить на дно мусорного ведра перед тем как застелить его целофаном. Запах апельсина поможет отогнать мелких насекомых, так как они не любят цитрусовые ароматы;
- Есил потереть масляной стороной шкорки о кожу, можно даже избежать комаринных укусов летом;
- Можно добавить апельсиновую кожуру к вашему пот пурри домашнего приготовления--белая мякоть шкорки обладает "всасывающими" свойствами и поглатит пдлохой запах и влажность из воздуха;
- По этой же причине можно набить шкорками мешочек их грубой материи--холста, например--и поместить его в шкаф, чтобы избавиться от затхлого запаха, или же держать в салоне автомобиля в качестве освежителя.
- Конечно же кожуру можно использовать в кулинарии. Специальной тёркой снимите цедру (это верхний слой)--не задев белую мякоть--и используйте цедру в приготовлении сладких или пикантных блюд для придания специфичного апельсинового запаха и вкуса;
- Можно также использовать всю кожуру полностью для изготовления цукатов (рецепт будет по позже, а пока собирайте шкорку);
- Если вы пьёте алкоголь, то можете сделать настой из шкорок с водкой или другим крепким алкогольным напитком;
- А если вы трезвенник, сделайте чай из сухих апельсиновых корок заварив столовую ложку на стакан кипятка в течении 5 минут.
January 03, 2011
Put yourself together, I meant put it together yourself
Let us say, your 4-year-old boy is obsessed with cars and you are obsessed with periodicals. Periodicals are obsessed with advertisement. Advertisement obsessed with cars. Here comes the Logic: rip off the car adds and make something new and useful for your son to obsess. How about puzzles?? Most four year olds love puzzles until they figure out life is a big puzzle itself. Great! New useful obsession for your little braniac! Moreover, new obsession for you: cutting things with Exacto knife! (Quite stress relieving)
What can be used:
-Magazine ads (with any pretty picture)—someone paid for this, so might as well use it up before trashing it!
-Cardboard to paste the pretty picture on
-School glue
-Wide sticky tape to "laminate" the picture (if real lamination is available—even better)
-Exacto knife
Kids can help by cutting the picture out of the magazine and pasting on the board. Exacto works better in skilled adult hands. If not so skilled, better use scissors.
Here, I cut the board in four using simple patters for easier assembly. For older kids, try more intricate puzzle pattern of your choice.
Cut+glue+laminate+slice=new puzzle (Tah-dah!)
==================================
Скажем, ваш 4-х летний малыш обожает машины. Вы обожаете глянцы. Глянцы в свою очередь обожают рекламу, а реклама обожает автомобили. Отсюда вывод: реклама авто для нового и полезного предмета обожания для вашего малыша. Как насчёт пазл?? Большинство четверо леток любят собирать паззл пока не поймут, что жизнь сама как большая головоломка. Отлично! Новый, полезный предмет обожания для вашего маленького умника! А к тому же, новая страсть для мамочки: резьба ножиком (хорошо снимает стресс)
Я использовала:
-Журнальную рекламу (с красивой картинкой)—ведь кто-то платил за эту красоту, так не выкидывать же не потрепав!
-Картонку, на которую клеится красивая картинка
-Широкий прозрачный скотч—чтобы «заламинировать»; если есть ламинирующая машинка—ещё лучше
-Школьный клей
-Ножик Экзакто
Дети могут вам помочь вырезая картинки из журнала и клея их на картонку. Наклеив картинку, заламинируйте её широким скотчем, а затем нарежьте на «кусочки» с помощью ножика экзакто (или ножницами). Это лучше сделать вам самой. Я нарезала свой паззл на 4 простые фрагмента, но если угодно усложнить задачку, можно нарезать на больше и более сложными линиями—вам решать!
Вырезать+приклеить+заламинировать+порезать на части=новая головоломка пазл