If I inspired you, I've done my job!
Showing posts with label lunch. Show all posts

March 05, 2012

Just a Quick Afternoon Post

The sun was shining bright this PM and I was lured to go out into my garden to start "clean up" after snowless winter but I was deceived. It was still freezing out. But I could almost feel the Spring's fresh yet timid scent. So, after few deep cleansing breaths, I went back inside.

I wasn't planing on writing or photographing a post today but the same frisky sun beam that summoned me into the cold earlier was tickling my earlobes whispering some promises… I had to put it to use.

Making hummus today for Meatless Monday sandwiches I decided to take couple of shots in this bright sunlight.

So a new little blog post was born…
◊◊◊
Toasted Sesame Seeds Hummus
makes about 6 cups

1 pack dry garbanzo beans, soaked overnight*
3/4 cup water, reserved from boiling beans
1/4 cup lemon juice (juiced from one medium sized lemon)
3 T spoons tahini (sesame paste)
4 T spoons olive oil
1 t spoon sea salt
2 garlic gloves, crushed

Garnish:
1 T spoon sesame seeds, slightly toasted on a skillet for 2-3 min
1 T spoon olive oil

  • After soaking the beans, drain and rinse them. Transfer soaked beans to the same pot (8 QT will do), pour over fresh cold water to fill 3/4 of the pot, bring to boil, lower the heat to med-high and cook for about one hour or until the beans are no longer crunchy. Once cooked, preserve 3/4 cup of the liquid and drain the rest. Let beans cool.**
  • In a food processor, combine garlic, lemon juice, tahini, salt, water, olive oil and beans. Process for 5 minutes until smooth.
  • Transfer to a bowl with lid and refrigerate for a week. Use it as a spread with pita bread and vegetables or on a sandwich.
  • To serve, spread about 1/2 cup (or a cup; although a suggested serving size is 2 T spoons, in my house we eat it by cups) on a plater making little indentations. Combine toasted sesame seeds with olive oil and pour over the hummus. You can add some freshly ground black pepper, paprika or ground cumin if you'd like…

*If you rather cut the prep time, use 2 13 oz cans of garbanzo beans and boiled water. Skip the first step.
**You can prepare beans a day before and store it in the fridge, but no longer than 2 days.

Oh, and the promise from the sun beam was that the Spring will be here soon!

September 23, 2011

Lingering the Roasted Summer Taste

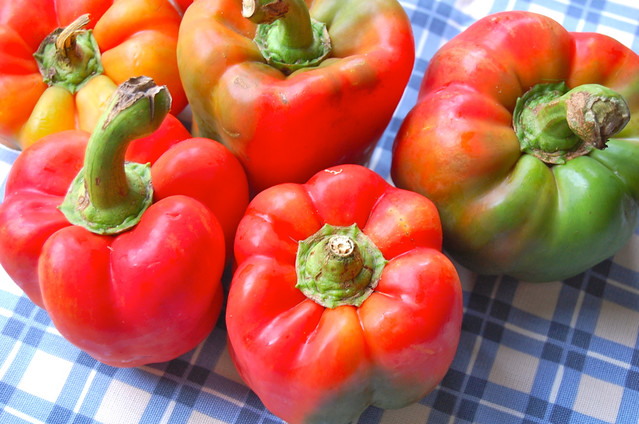
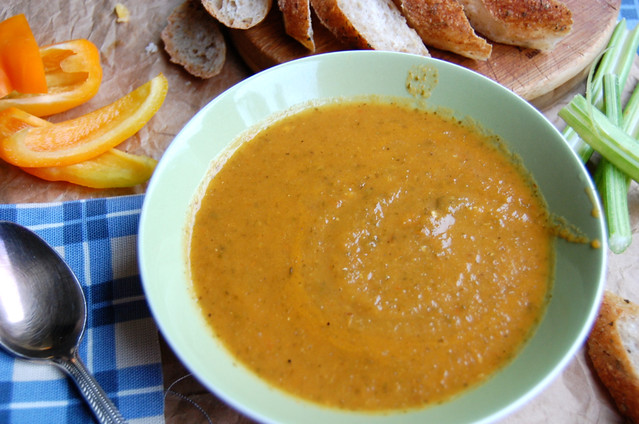
Before we kiss the summer harvest good-bye, I want to share this new recipe. It is a perfect treat for a rainy early autumn days yet a tasteful reminder of summer. The pungent taste of the bell peppers, which are still available at the farm marked, is the perfect summer taste that I want to hold on to. Let it linger, just a little more…

I came across a picture of this recipe somewhere online and since I had an overload of heirloom bell peppers, I couldn't resist not to try it. I would say I heavily adapted it for I didn't even bother reading the recipe, I was too inspired and exited to make this soup.
To counterpart the taste of bell peppers, I used fresh celery, which is also still abundant at the market. I used stems and leaves, which given my soup its fresh note.

◊◊◊
Roasted Pepper+Celery Soup
Serves 8-10
6 medium bell peppers
2-3 celery stalks+leaves, chopped
1 medium onion, diced
2 T spoons olive oil
6 cups water/stalk
Salt+Pepper to taste

• Preheat the oven 450° F. Wash peppers
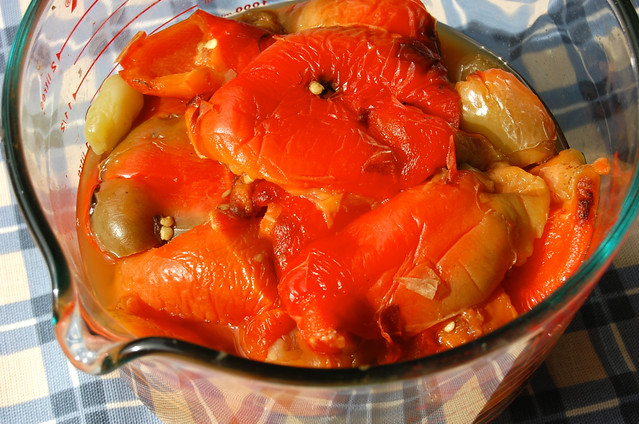
• Line peppers on a shallow cooking sheet, roast in the preheated oven for 20 minutes
• Place the peppers in brown paper bags and let cool. When cool, peel the peppers collecting the juices and discarding the seeds and stems
• In a pot, heat the oil and sauté onions and celery for 5 minutes over medium heat
• Add peppers with the juice. Sauté for another 5 minutes
• Add water, bring to boil over high heat. When boiled, add salt+pepper
• Remove from heat and blend with an emersion blender or in stand-up blender in batches
• Serve with some fresh celery, peppers and your favorite bread
Summer is gone, but we can still savor its flavor even if for a little while…

August 01, 2011

School your children, but learn from them

In Russian, there's a saying "Старики, как дети", in English: "Old people are like children". This means that the old people behave like children. But if you think about it and consider different understanding, it could mean that for us, adults, old people are as valuable as children. We have to take care of them both, we have to protect them both, but most importantly, in my understanding, they both can teach us life lessons…

It is clear how one can learn from an elderly person, whose stories are brimmed with life experiences and valuable lessons. But, with all due respect to the elders, today I want to talk about children and what they can teach us while we're so busy schooling them.

Las weekend, we had a sleep over and there was seven children in my house for two joyful days. I couldn’t help myself but devote my entire Sunday to my amusing little guests. And I have to admit, I had the best time in so long!

They reminded me how it is to be a child; how to be imaginative; how to be innovative; how to give into the moment wholeheartedly.

Have you ever noticed how children look at the world around us? Everything is new, everything is exciting, and everything brings joy. Why do we stop viewing the world through the looking glass of our inner child?

You might say that as we grow older we become more responsible. And I do agree. But look at the root of this word: response. How can you response to or for something that you don’t even pay full attention to, something you do in autopilot mode?

The kids look at things they encounter in life with their full attention. A genuine interest is what becomes a little propeller for their little ever-inquiring minds.

Why do we stop inquiring? Is it because we think we have acquired?

As we mature, we loose these valuable skills, disregarding them as “childish” and “immature”. But our inner children never give up, waiting patiently for another chance to come forth, to remind us of simple joys and how easy it is to be happy.

The children can show us that there is so little needed to be happy. They don’t really care about having many toys or things they just want company. The rest is easily falls into place when they turn their imagination on! I barely dare myself to give anyone a parenting advise, but I must say, stop overwhelming your kids with acquisition so they can go on inquiring! Give them something they can do/make, or better yet create, not just have in possession. Give them an experience! It applies to us, adults, too.

This past Sunday, we filled our day with just joy and laughter. One of the girls came up with idea of DIY water slide. We cut up a wide strip of heavy duty plastic (I used a pool cover bubble plastic) and laid it on a sloped part of our backyard. We have arranged two garden hoses, one at the beginning and the other one in the middle, to create a fun water slide, as good as any store-bought one! I think it was a genial idea! (My body thought otherwise, waking up all beaten up next morning, but who cares?!)

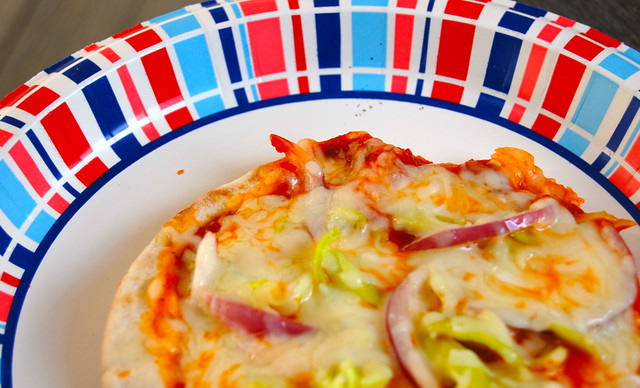
When we got hungry, another guest of mine proposed we make pizza for lunch. As I was making excuses to why I can’t make pizza right now (don’t have yeast, can’t go to store with all of them, etc.) she said that we could use pita bread. And so we did.

I set up a pizza making station and we started to create our own culinary “masterpieces”. I chopped any veggie I found in my fridge or garden, shredded some mozzarella cheese and got the tomato sauce.

Kids layered the ingredients on top of the pita bread, finishing with some garlic powder and ground black pepper. We grilled the pizzas on the gas grill for 15-20 minutes or until the cheese was melted. Then, impatiently waited for it to cool down, enough to be able to chomp on it… it was good!

Find time in your life to let your inner child out of it’s “naughty corner” of our daily rut and you will gain a new, fresh, and happy perspective on life!

March 30, 2011

Haliva—Circassian Pierogies

Strolling through the frozen isle in my supermarket, looking for ideas for my last Meltdown for March, hoping that the weather will melt down soon, too I came across pierogies. Right next to Polish pockets full of yummy I saw Chinese dim sum and egg rolls, Italian ravioli and even Turkish borek. Then I spotted Mexican empanadas, looking so sad with a frown next to frozen empanada dough disks. It dawned on me that there is variant unleavened dough wrapped around stuffing creations, fried or boiled, in almost any cuisine. I remembered our own—haliva. Whether fried or boiled—psi haliva, or with different stuffing—cheese, potatoes, meat—they are always a special treat!
I have heard that nowadays many cooks use frozen dough to make these hot pockets (oh, boy! now the jingle from the commercial ad for “Hot Pockets” is stuck in my head) and I agree that it is quite convenient. So why not make your own and freeze them?

Unleavened dough is very easy to make. All you need is water, egg, pinch of salt and flour. To be exact:
1 cup of warm water (102° F)
1 teaspoon salt
1 large egg
3 ½ + cups all purpose flour (you can use white or whole wheat)
  1. Put salt in the water, add egg and mix it all until well combined;
  2. On a clean dry surface pile up the flour, make a well and slowly pour water+egg mixture with one hand, starting the dough with the other;
  3. Knead the dough until semi-soft and smooth, cover and let rest for about half an hour for gluten to set.
Roll the dough in batches to 1/8˝ thick and cut out circles 5 ½˝ in diameter—I used a top of a small sauce pan.
This recipe yields about 50 disks 5 ½˝ in diameter. You can make these shapes smaller or bigger, depending on how you are going to use them. We like bigger size for fried halivas. Layer parchment paper in-between the disks or flour them generously and freeze them up to one month in a zip lock bag, 10 per each package. When needed, thaw the disks at room temperature for about one hour in the bag.

Unleavened dough is very versatile. You can stuff it and fry, boil or bake. You can make ravioli, tortellini, pierories, pelmenis, empanadas, dim sum, egg rolls, manti, borek, haliva and you can even layer it to make a lasagne dish! Not to mention it makes yummy unleavened bread.

Since this time of the year for unleavened breads and vegetarian diet, I decided to make cheese haliva this time. I made my own milk cheese.

I might sound intimidating to make home made cheese, but I can assure you it is not scary at all! All you need is a gallon of milk, a cup of white distilled vinegar, and some seasoning, if you desire.

This is what you do: bring a gallon of milk to a boil in a large stockpot. Stir constantly to prevent scorching. When milk starts to foam, turn off heat and add vinegar. Let it curd for 8 to 10 minutes, add seasoning—I used 1 teaspoon of ground savory and 1 teaspoon of salt. Line a colander with cheesecloth and pour the cheese through. You can collect the whey to use it in other dough recipes or to drink—it is quite thirst quenching—by putting a large bowl under the colander. Let the whey cool and then transfer it to a jar with lid and refrigerate. What is left in colander is your homemade cheese for haliva. Set it aside as you prepare your dough.

To assemble halivas, put one tablespoon of cheese on the disk, brush the edges with water using your finger or pastry brush, turn it and pinch sides with fork. I make large pinches because I like the crunchy edge. You can also use the dough wheel but I do not have one so fork works for me.

In a large skillet, heat ½ cup of vegetable oil—any light frying oil that does not burn, I used corn oil—and fry 3-4 haliva at a time. 2 minutes on each side. Do not let it brown; the color should be gold or orange.
Transfer the pockets onto a platter lined with paper towel to soak up the excess oil. Serve with hot tea, yogurt drink, or that whey that you have collected while making cheese.

Enjoy!

{Note} If you don't like cheese you can substitute it with mashed potatoes. I know I will have to make potato version, too, just for Maya—my meat and potatoes girl!

March 14, 2011

DIY Chicken Nuggets—for real!

Slowly but surely the snow continues to melt around here, revealing last year's mush of fallen leaves and un-trimmed grass. With the cheerful accompaniment of birds' chirping I'm happy to see my backyard covered with mud rather than snow and ice. The meltdown continues.

This time I'm melting down the all time, all kids' (as far as I know) favorite—chicken nuggets. Many of us, parents, already know how unhealthy pre-cooked frozen version could be so I won't go into details. First time I cooked home made nuggets was a while ago. I repeated the attempt few more times but it digressed. Because of one problem—my home made nuggets would never come out good enough for kids to make a switch. Why, oh why?!

One day, I was watching Jamie Oliver's Food Revolution, the very fist episode of his reality show in US and I realized what I was doing wrong. And it was revolutionary, indeed! However, very simple.

Fist of all, I was making them from the whole piece of chicken breast thus creating an unfamiliar texture. Kids could be very sensitive to the texture issue, you know! Second, I was baking them in the oven, thus making the outside not so crispy—another criteria that has not passed my chicken nuggets experts' judgement.

I saw Jamie pulverized chicken carcass in a food processor and then shape the nuggets/patties and then frying them in a little bit of oil—how easy is that! Plus this technique reminded me of the familiar one we use to make "Kotlets" (meat patties) out of minced/ground beef back in Russia.

So I tried the new way to make real nuggets. But instead of chicken carcass that was used in Jamie's experiment as a repellent, I used the expensive cut—chicken breast. And it worked! Passed kids approval on the spot with "so crispy", "so juicy" and "tasted just like the real ones" feedback. Clearly, the term 'real' is used very loosely here!

Here's what I did…

◊◊◊
DIY Real Chicken Nuggets
{Note 1: This recipe yields 16 pieces and I fried them in a small(er) non-stick skillet, 8 at a time. For this reason I needed to add fresh oil to the pan for the second batch. But if you have bigger frying pan, you can fry them all at once and don't need to add more oil. I used olive oil (not the extra virgin) but any vegetable light oil of your choice will do}

1 1/4 lb boneless chicken breast (about 2 breasts) extra fat trimmed
1/2 teaspoon garlic powder
1/2 teaspoon ground savory
(or any other dry herb of your choice)
1 teaspoon onion powder
1 teaspoon salt
1 teaspoon freshly ground black pepper
1/4 cup all purpose flour

2 eggs, beaten

1/2 cup Panko bread crumbs
(if you can't find it, make it yourself—see note below)
1/2 teaspoon dry savory
(or any other dry herb of your choice)
1/2 teaspoon paprika—optional, but gives a nice color

1/4 cup olive oil (+a little more if you're frying in batches)
  1. Prep chicken: Wash and pat it dry. Cut into chunks and put it in the food processor (blender) with spices: salt, pepper, savory, onion and garlic powder. Pulse two times, set aside.
  2. Prep crumbs: add savory and paprika to the bread crumbs and mix well with fork.
    {Note 2: If you can't buy Panko bread crumbs, make it by drying 2-3 white bread slices with crust cut off in 325°F oven for 10-15 minutes until the bread is dry but not toasted. Cool a little and crumb with your hands or in a food processor}
  3. Shape the balls: measure the chicken with the cookie scoop (or tablespoon) then roll in flour and shape balls; set aside.
  4. Assemble the nuggets: make a breading "station": eggs in one bowl, crumbs mix in the other. Dip a nugget ball into eggs then roll it in the crumbs, one at a time. Press with thumb to flatten the ball. After all nuggets are shaped, pop them in the fridge while you heat oil in the pan.
  5. Fry nuggets on medium-hight to high (on my electric cook top's dial it is set to 8, so it's not all the way high but close to it), 5 minutes on one side. Flip and fry 5 more minutes. Place them on a dish towel as you take them from the pan so the excess oil is absorbed.
  6. Serve with your favorite condiment—my kids gobbled them up with ketchup—and some vegetables on the side. Plain 'ol me likes it with plain 'ol sour cream :)
My little critics happily reported that I will never have to by the 'real' chicken nuggets again. For real?!

February 01, 2011

The beet of your heart

I chose the beetroot for the first day of February for a reason. February is proclaimed a Heart Health month by American Heart Association. Read on and you will see why.

One can write an extensive thesis on medicinal propertied of this gem colored vegetable. It is recommended for prevention and treatment of anemia, hypertension, and other cardiovascular diseases.

Dark-colored varieties of beets help strengthen the capillary walls. Substances contained in its root have vasodilator, antispasmodic, anti-sclerotic and soothing effect. In addition, they facilitate the allocation of the excess fluid from the body and are needed for normal functioning of the heart. Beetroot shape itself resembles this vital organ!

Beet root crops contain 14-18% dry matter, 11-12% sugar, 1.7% protein, 5-17 mg of vitamin C. The beets also contain a small amount of carotene, vitamins B1, B2. But what gives this vegetable a special value is vitamin P, which can increase the elasticity of blood vessels, prevent multiple sclerosis and internal hemorrhage.

In addition, beet is useful for the liver. Contained in this vegetable betaine—which is also a natural dye—activates the liver cells and prevents their fatty degeneration. Beetroots contain significant amounts of pectin, which protect the body from exposure to radioactive and heavy metals (lead, strontium, etc.), contribute to the removal of cholesterol and inhibits growth of harmful microorganisms in the intestinal tract. Salts of iron, calcium, magnesium, and phosphorus, cobalt found in beets also activate the blood formation and regulate metabolism. In iron content, beets trail only to garlic.

Among all other things, beetroot is rich in organic acids that are useful for human body: malic, citric, and tartaric. It also contains minerals such as phosphorus, calcium, sulfur, and sodium.

And let us not leave out the leaves. Beet leaves contain about the same nutrients as the root, but the beet tops have more vitamin C, although less fiber.

Today, I prepared a simple lunch recipes: beetroot soup-puree—although the most traditional soup in this category would be Borsch, but its recipe I will share separately!—and pies with beet leaves and cheese.

This soup is borrowed from Turkish cuisine, where it is traditionally made from roasted beetroots.

◊◊◊

ROASTED BEET SOUP

6 medium beetroots
2 TB spoons vegetable oil
1 TB spoon unsalted butter
1 cup diced white onions
1 cup chopped carrots
1 cup chopped celery
2 t spoons ground cumin
1/2 t spoon ground red hot pepper
1 t spoon ground black pepper
1 t spoon sea salt
1-2 dry bay leaves
6 cups water or broth
bunch of fresh dill weed
sour cream (or Greek style yogurt)

  1. Heat the oven to 375°F, wrap each washed and patted dry beetroot in aluminum foil and bake for 1 hour. Remove from the oven—beets have to be tender but not overcooked—cool, peel and chop into disks.
  2. In the pot, heat oil and melt butter in it. Add the chopped vegetables: onions, carrots, celery, garlic, and sauté them for 5-7 min or until onions are translucent.
  3. Add spices (besides salt) and beets; mix and pour water or broth and bring to boil. Once boiled, add salt, turn the heat to medium-low and cook for 30 minutes.
  4. Remove from heat, take out the bay leaves, and blend with an immersion blender. Return to heat for 10 more minutes.
  5. Serve with dollop of sour cream (or yogurt) and chopped fresh dill weed.

~~◊◊◊~~

Beet leaves and cheese pies—tsakharadhiin—are traditional Osetian dish. Osetins are one of the indigenous people of North Caucasus region, and I'm 1/8th Osetian (I know it's totally irrelevant).

You may use already prepared yeast dough or buy frozen bread dough and thaw only one loaf, but I deiced to make my own using whole wheat flour; and instead of butter I used clarified butter—it gives sweet note to the pies that compliments saltiness of the cheese and tartness of greens.

Traditionally, Osetian cheese that is similar to Greek feta is used. However, Greek feta works just fine! This recipe yields 3 10 inch pies: it is Osetian tradition to bake three round pies at a time. And to serve it with sour cream and dill dip. Only I used Greek style yogurt in lieu of sour cream. I used the same dip with the beet soup, too.

◊◊◊

TSAKHARADJIN—OSETIAN BEET LEAVES AND CHEESE PIE

For the dough:

1 TB spoon dry active yeast
2 cup warm (100-110F) water, divided
1 t spoon sugar
1 TB spoon vegetable oil
1 t spoon salt
2 cups whole wheat flour
1 1/2 cup barley flour, divided (or all purpose flour)
+more for dusting the surface

For the filling:
2 cups beet leaves
1½ (20 lb) pounds feta cheese
One bunch of scallions
1 cup chopped fresh dill weed

For serving:
½ cup clarified butter (or melted butter)
Sour cream (or Greek style yogurt) with chopped dill weed

To make the dough:
  1. To 1 cup of warm water, add yeast and sugar and without mixing let stand for 10 minutes.
  2. In a bowl with 2 cups of whole-wheat flour and 1 cup of barley (or all purpose) flour, pour the water, oil, and salt; mix the sponge with a wooden spoon.
  3. On dry clean surface pour 1/2 cup of barley (or all purpose) flour, take the sponge and knead the dough until most the flour is used up; dust the dough with flour and put it back into the bowl, cover with clean kitchen towel and let stand in a warm and non drifty place for and hour. Meanwhile, prepare the filling.

To make the filling:
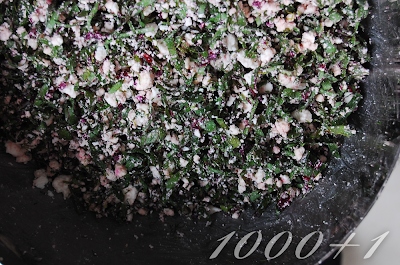
  1. Wash and dry the beet leaves and shop them into thin ribbons; mix it with finely chopped scallions and dill.
  2. In a separate bowl crumble the cheese, then add the greens and black pepper.
  3. Divide the filling into 3 parts and roll into ball shape.

To assemble and bake the pies:
  1. Preheat the oven to 450°F and keep cast iron skillet (of metal baking sheet) inside the oven to be heated, too.
  2. Divide the dough into tree parts. On a dusted with flour surface roll the dough with a rolling pin or stretch with hands into circles about 7/8 of an inch thick.
  3. Put the filling in the center of the dough, push it in, and gather the dough from around the edges closing in it on top. Pinch off any excess dough. With hands even out the pie. Push it into shape (10 inches in diameter) and poke a hole 1 inch in size in the middle.
  4. Transfer the pie on a hot skillet (baking sheet) and bake for 15-20 until it starts to turn light brown.
  5. Brush the pie with butter. Repeat for the second and third pie.
  6. Serve hot, cut in 6 pieces, with a sour cream (yogurt) and dill dip.

I understand that this time of year many people would prefer chocolate as their main ingredient not only because it makes a nice valentine day treat but also because its dark varieties are good for the health. I understand also that beet might not win competing for a place on your table this month because it might not look so attractive. But have you seen or tasted Cocoa au naturelle? Right, now beet doesn't look so bad!